Annie Monaghan's Art Room
  • Home
  • Elementary Art
  • Middle School Art
  • Camp projects
  • Lesson Plans
  • About Me
  • My Artwork
  • Art is everywhere!
  • Contact me
  • Professional

Kindergarten spider color wheels

10/31/2016

0 Comments

 
Picture
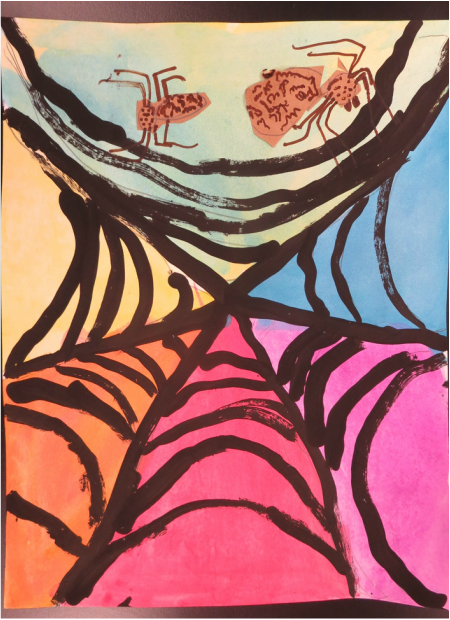
I switch up how I teach color wheels with the Kindergarteners every year because I get bored teaching the same projects over and over.  This year I decided to do spider web color wheels as we were approaching Halloween.  I came across THIS blog on pinterest which inspired my lesson.

I always start the Kindergarten color wheel project by showing the wonderful OKGO's music video "Three Primary Colors."  I take any opportunity I have to show students music videos by OKGO.  They are brilliant.  This song gets stuck in my head for weeks every time I watch it which hopefully means that it gets stuck in the Kindergartener's heads too!
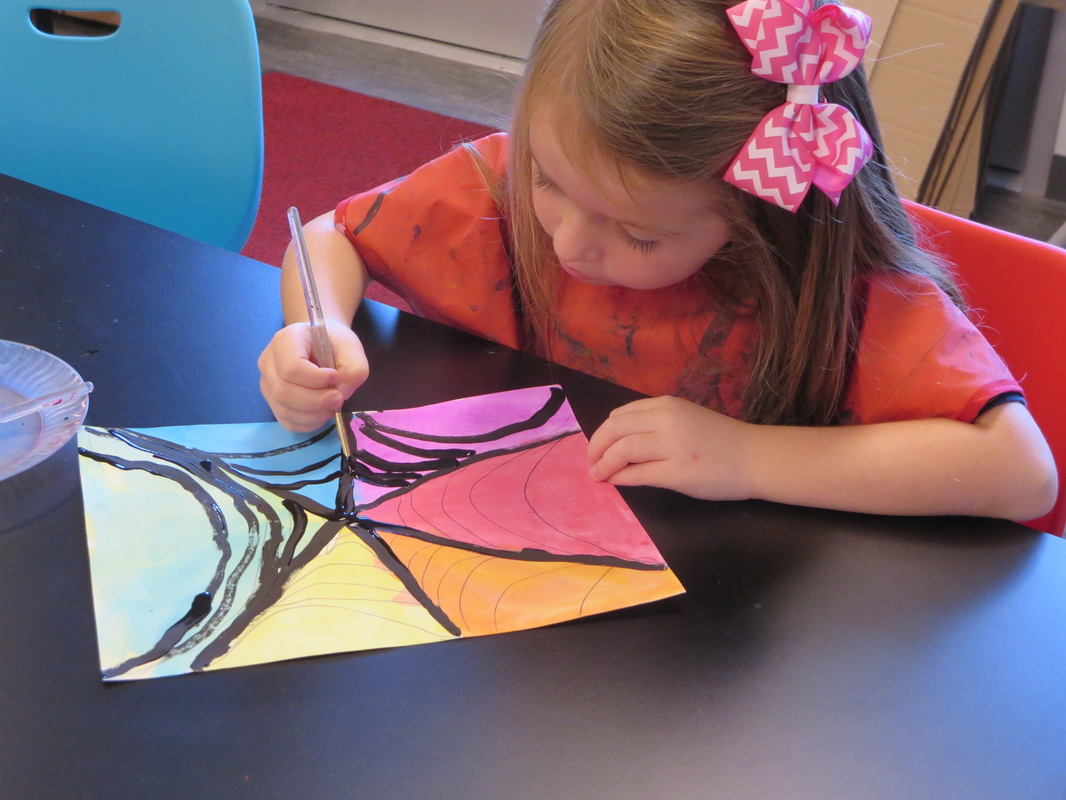
After watching the OKGO video, we started our spiderwebs by drawing a little dot in the middle of our paper with pencil and drawing six straight lines spread out that started at the dot in the middle and went all the way to the edge of the paper.  As they worked, I made sure to walk around and check that each student did exactly 6 lines so that the color wheel would work out.  

Next, we used watercolors to paint in the three 'corners' (every other slice) with the three primary colors: red, blue and yellow.

TO fill in the other three slices, we mixed our paints together to create the secondary colors: purple, green and orange.

Our next step was definitely the most tricky for the students, which is why I am super thankful that I thought to have them start with pencil BEFORE painting with black.

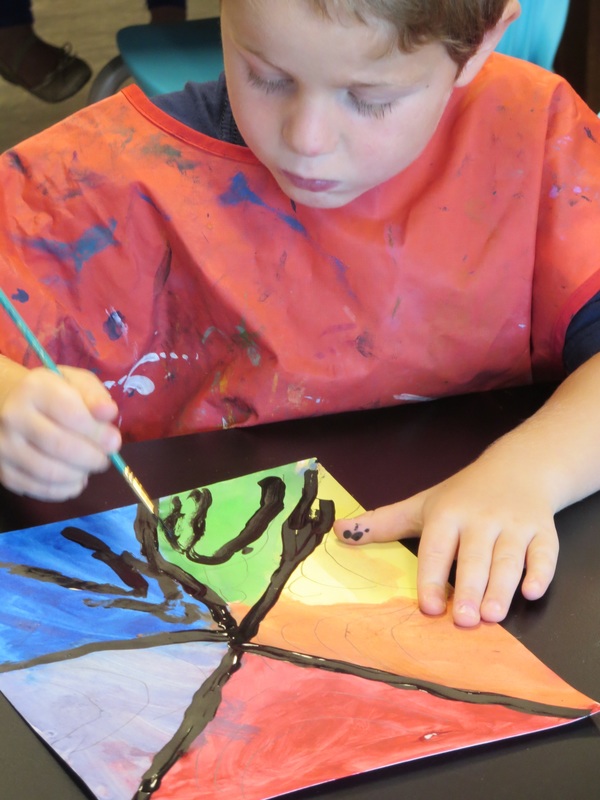
I showed them how to draw the spiderweb design by starting with one color slice at a time.  Look at the slice so that it is pointing upward and draw about 5 hills that go from one side of the slice to the other.  Continue this for each color slice.

Some students figured this out right away but there were quite a few who really struggled with making these hill shapes and making sure they went all the way across each color slice.

After I helped everyone get their hills correct, we used black tempera paint to paint the straight lines that separate each slice and to paint over the hills.

Picture
Picture
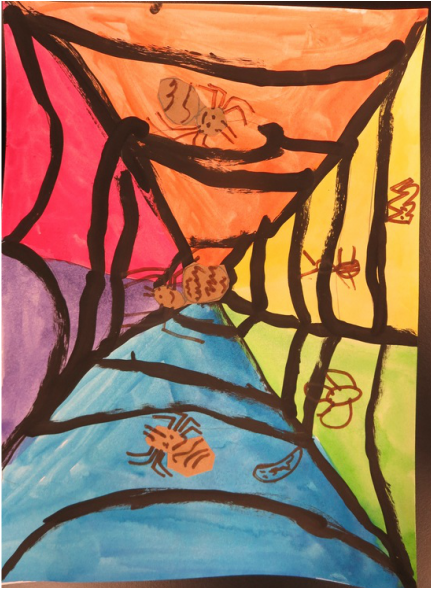
On the last day of this project, I taught them a little bit about spiders bodies and asked them what kinds of spiders they knew of.  I was impressed with how many they were able to list.  The main thing I focused on was that there are 8 legs on spiders that actually come out of the head region and NOT out of the abdomen.  

To create the spiders, they cut out two ovals of brown paper for the head and abdomen and then used markers to draw texture, glued them on the web, and drew their 8 legs.  Students could make as many spiders as they wanted.  Some students did only 1, while others make like 7 spiders.

​They turned out pretty cute overall.  If I do this project again though I will come up with a different way to make the spiders probably.
Picture

0 Comments


Leave a Reply.

    Author

    Annie Monaghan.
    Art lover.
    Art creator.
    Art teacher.

    RSS Feed

    Categories

    All
    1st Grade
    2nd Grade
    3rd Grade
    4th Grade
    5th Grade
    Abstract
    Art History
    Art Videos
    Auction
    Batik
    Cardboard
    Chalk Pastel
    Clay
    Collaboration
    Collage
    Colored Pencil
    Color Wheel
    Contour Lines
    Drawing
    Highlights And Shadows
    Kindergarten
    Landscape
    Mural
    Names
    Notan
    Observational Drawing
    Oil Pastel
    Online Art
    Origami
    Paint
    Painting
    Papier Mâché
    Patterns
    Portraits
    Pre K
    Printmaking
    Relief Sculpture
    Remote Art
    Remote Learning
    Sculpture
    Self Portrait
    Self-portrait
    Sewing
    Shapes
    Sharpies
    Still-life
    Symmetry
    Texture
    Tissue Paper
    Warm And Cool Colors
    Watercolor
    Weaving

Powered by Create your own unique website with customizable templates.