Annie Monaghan's Art Room
  • Home
  • Elementary Art
  • Middle School Art
  • Camp projects
  • Lesson Plans
  • About Me
  • My Artwork
  • Art is everywhere!
  • Contact me
  • Professional

2nd grade tint study with trees

9/12/2018

0 Comments

 
Picture
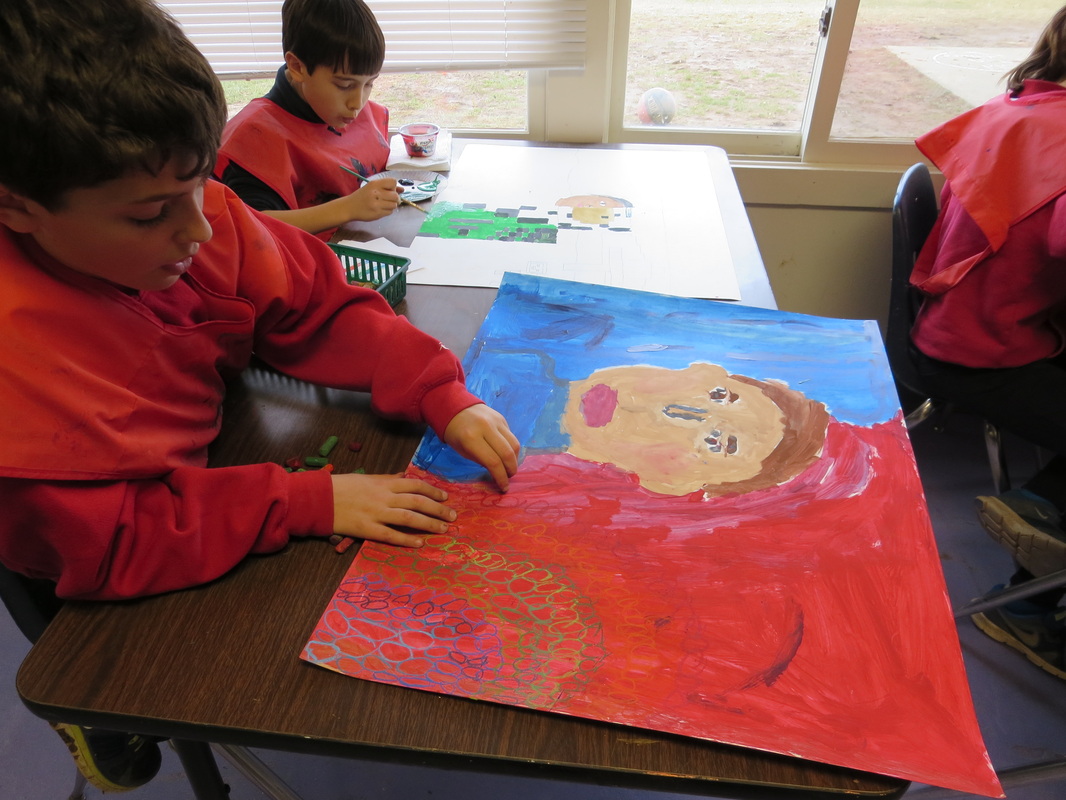
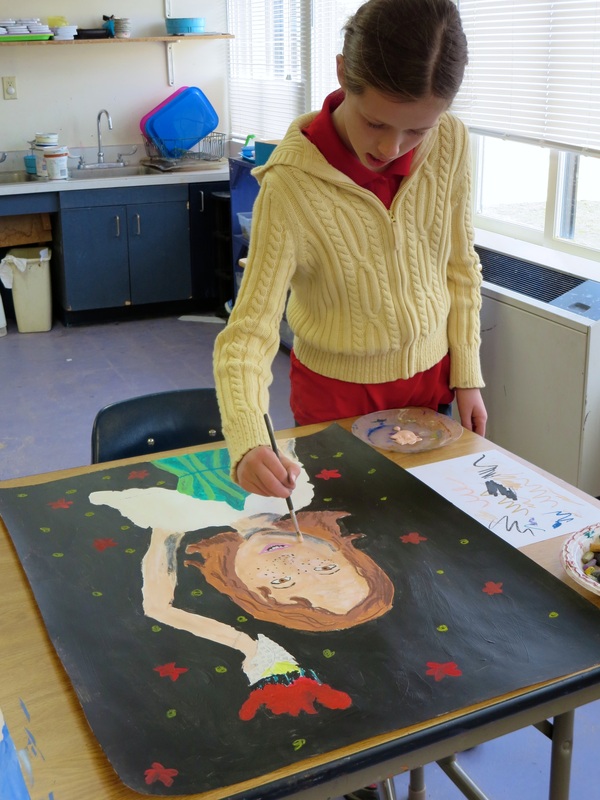
Woo-hoo, mixing colors is so much fun!

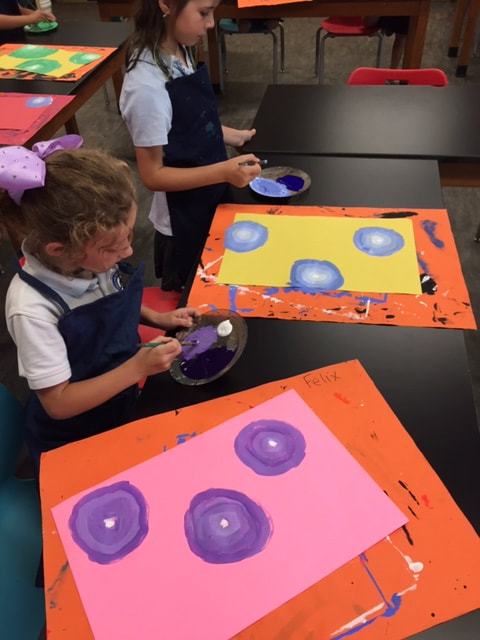
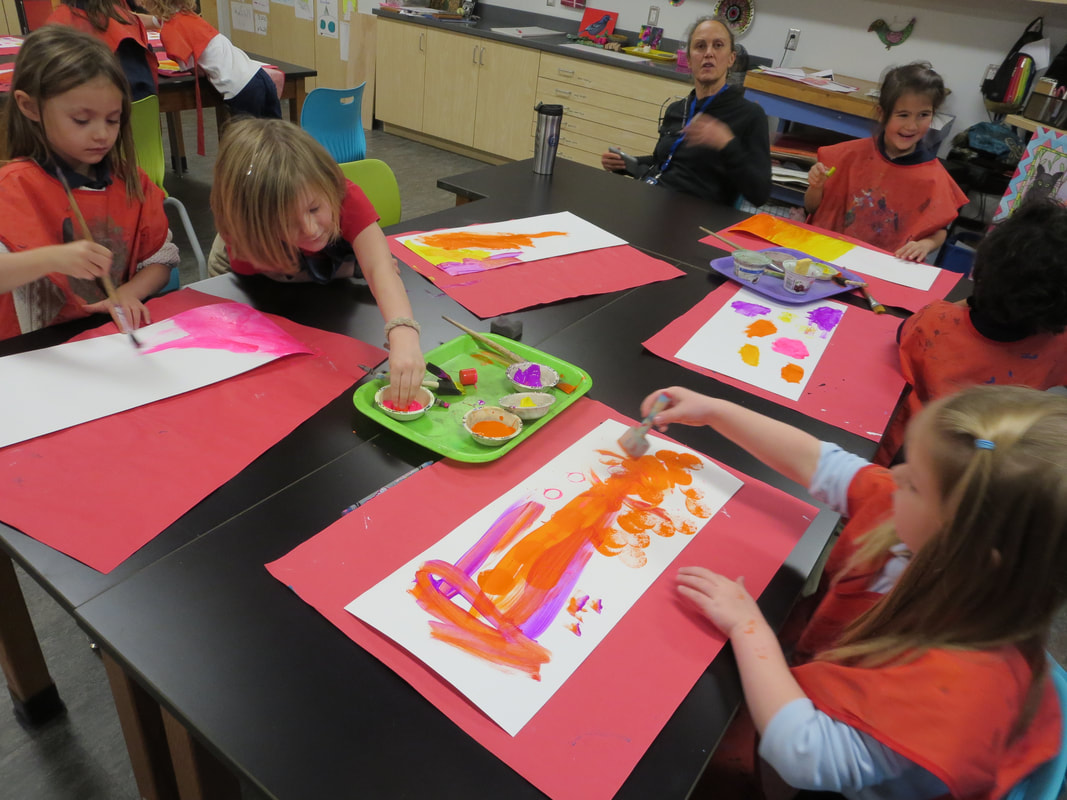
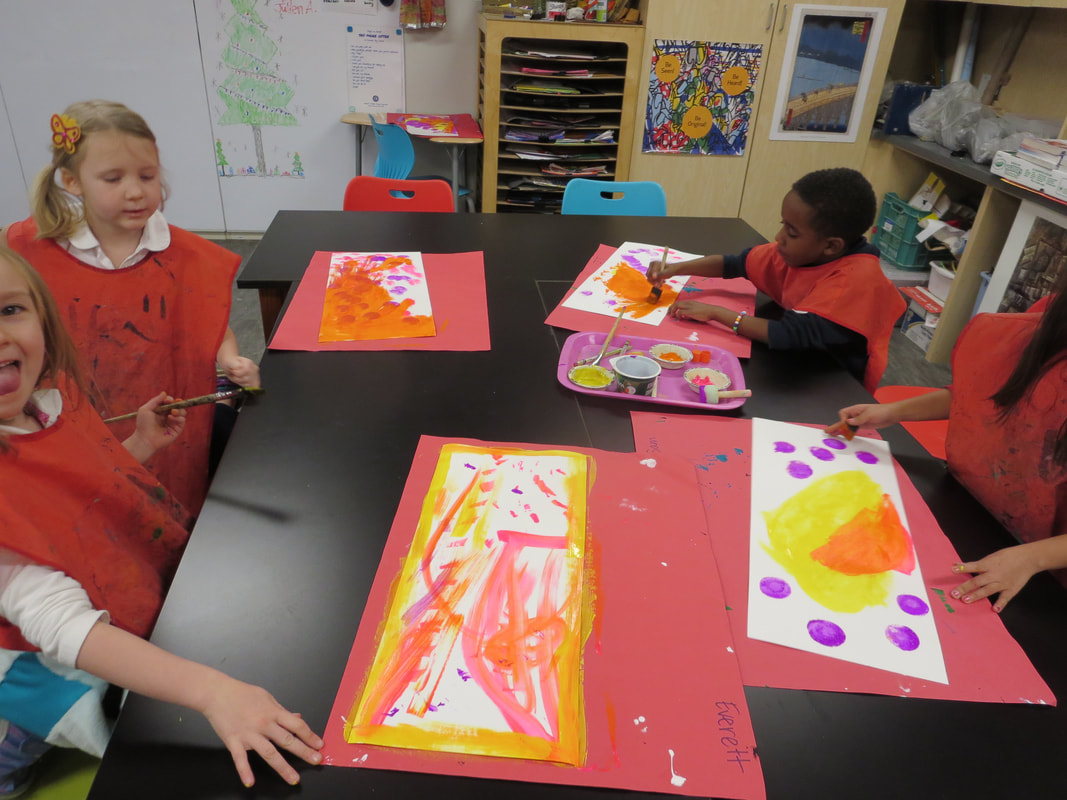
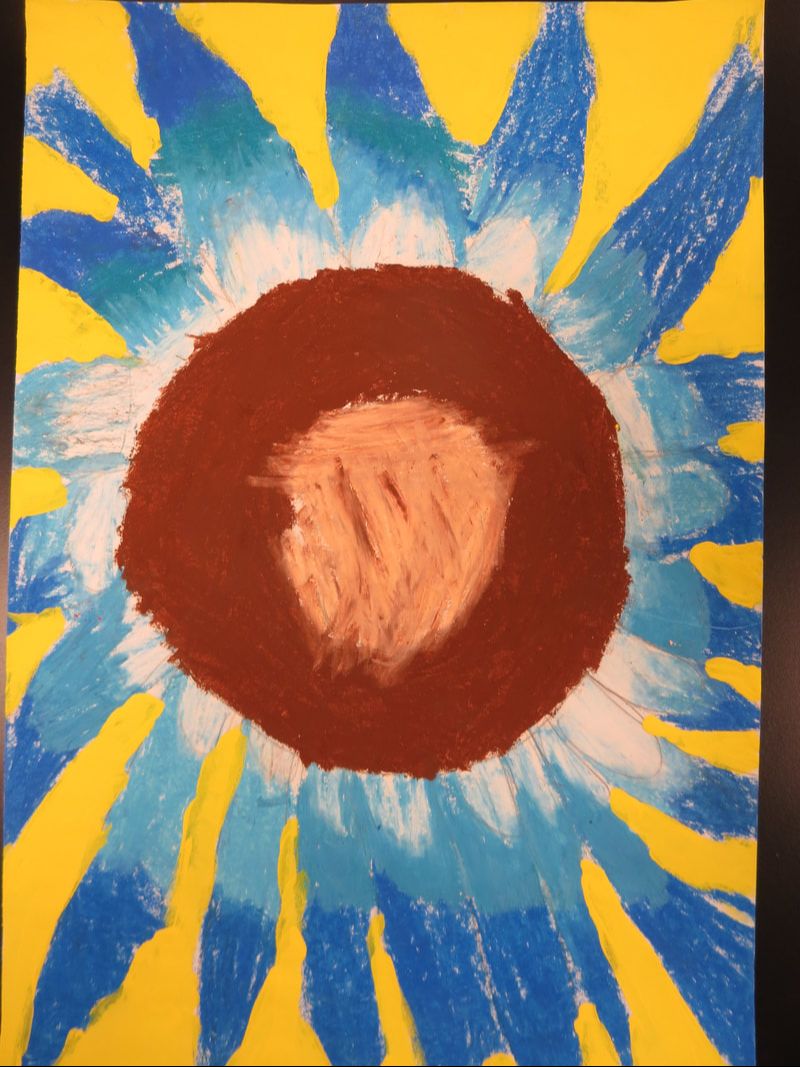
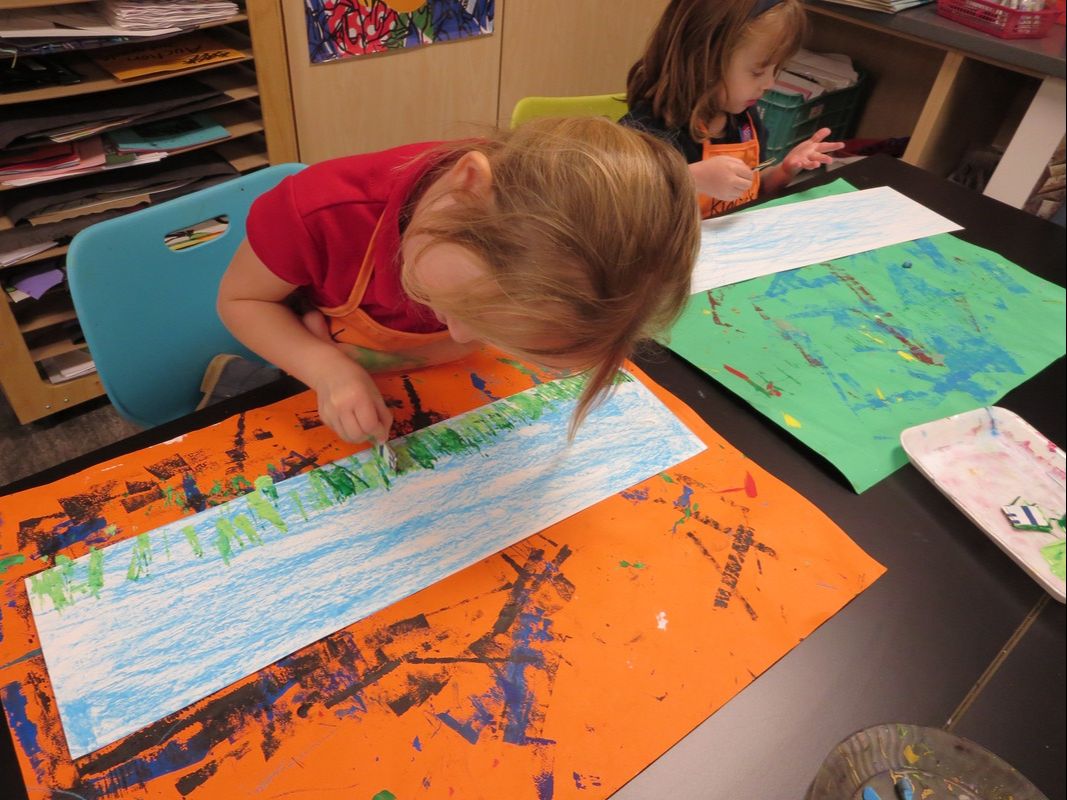
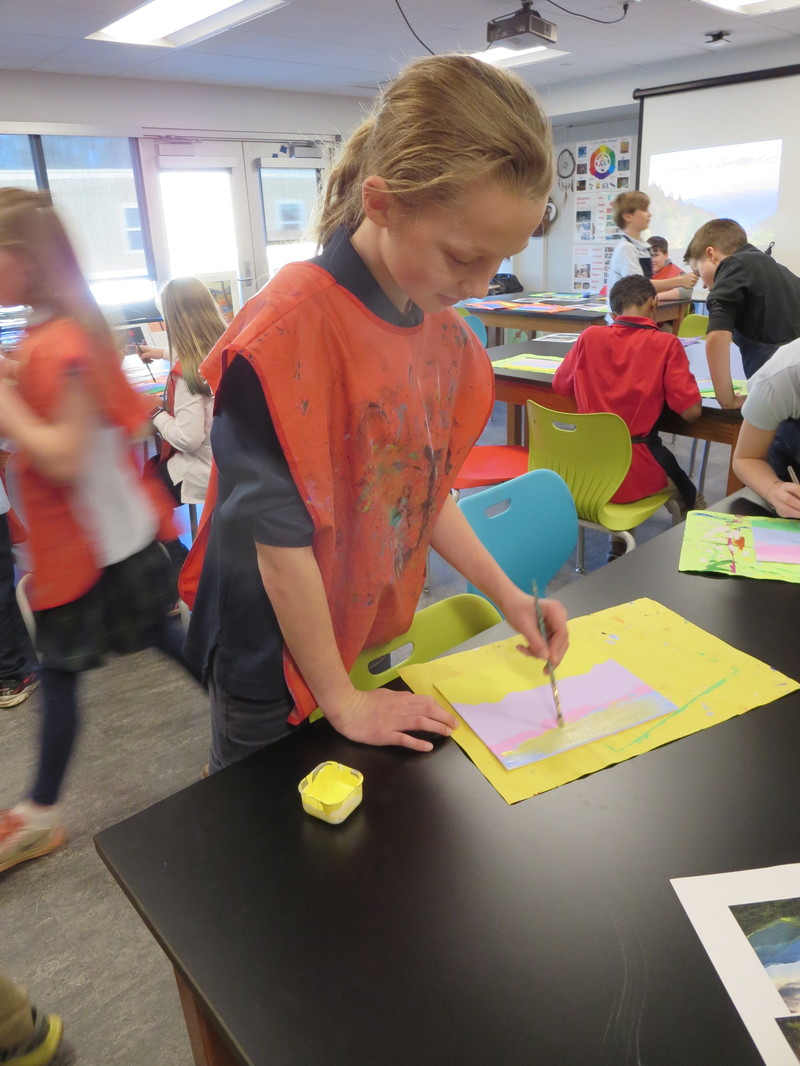
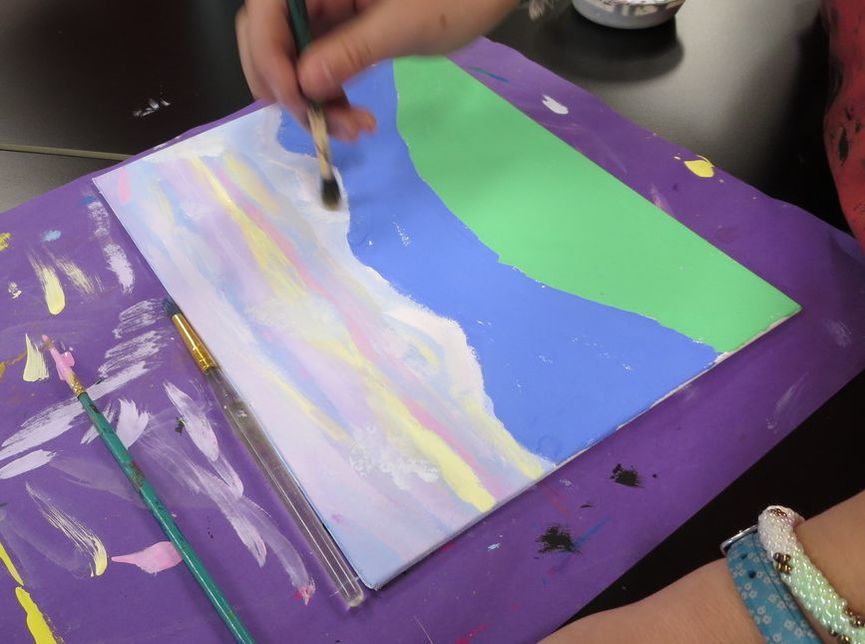
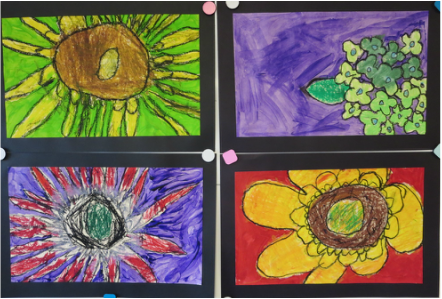
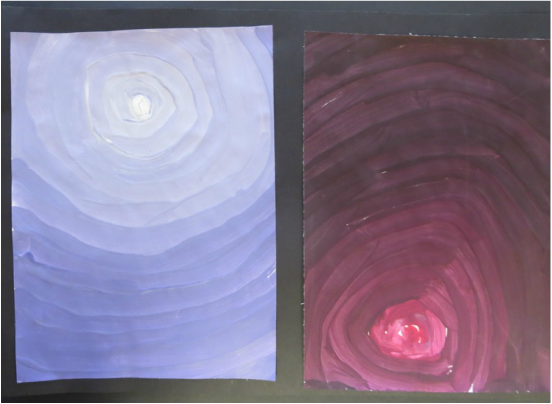
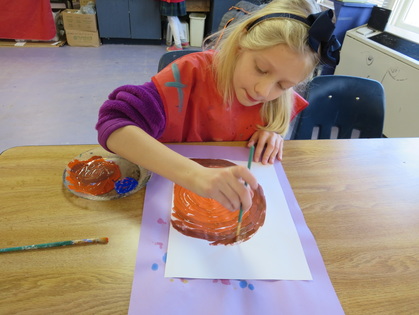
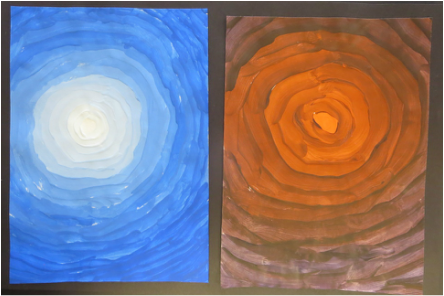
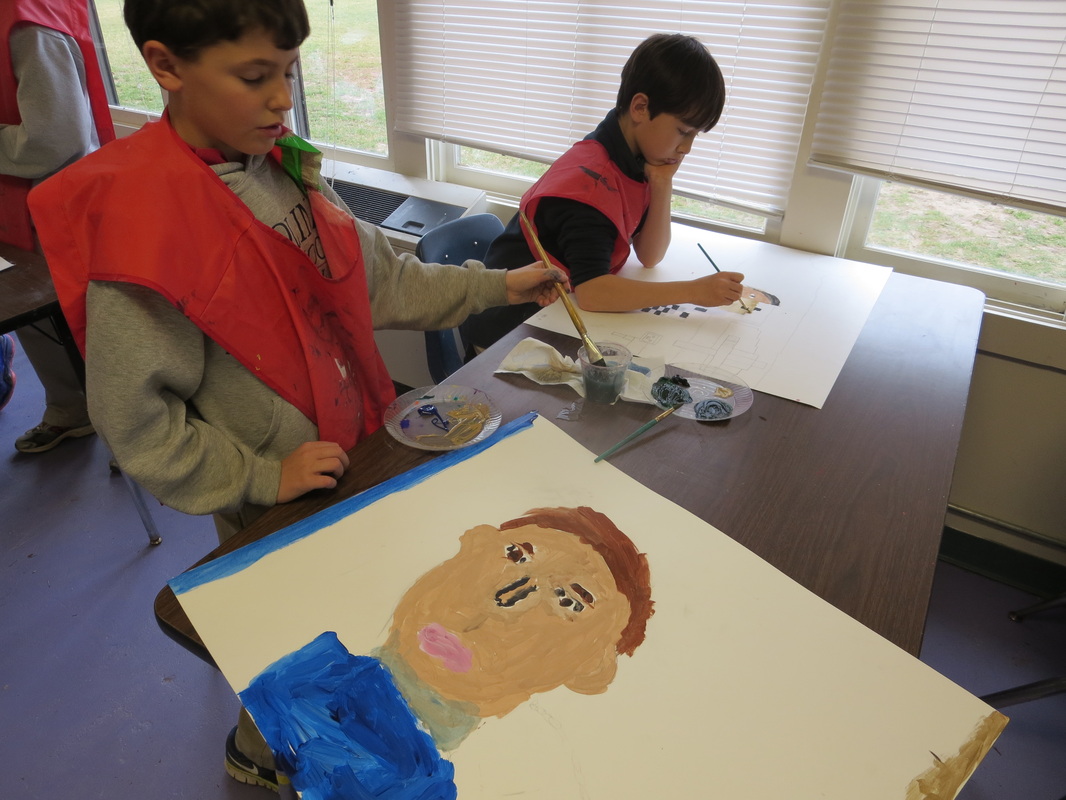
2nd graders learned how to mix tints during this painting project.  

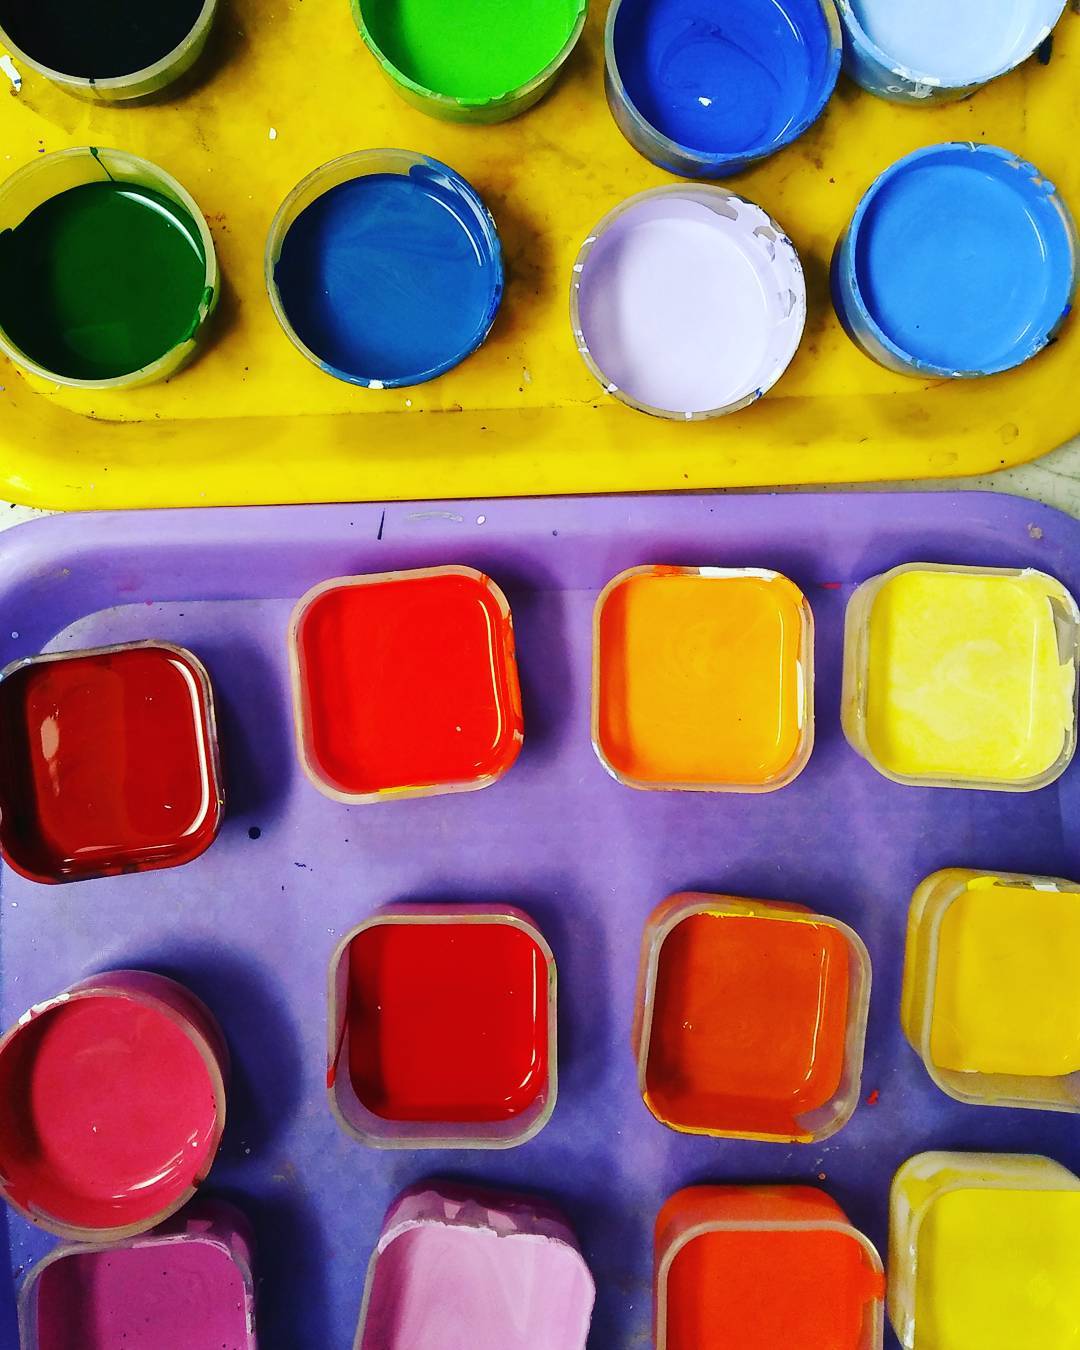
To get started, students each got to select a color of construction paper for their background color.  I had all of the colors of the rainbow available (plus pink).  After selection their background color, they had about 5 different paint colors to choose from as well.  The paint color was what the would be mixing with white.

I demonstrated how to paint three concentric circles of paint by starting with white and painting three dots spread out on the paper.  Next they took just a tiny bit of the other color on their paintbrush, mixed it completely with the white and used that new color to paint a circle around the white.  This process continued until the circles were so big that they started to overlap.  

I was impressed with how focused the students were on this process.  They were determined and in the zone.  Another proud teacher moment for sure. 
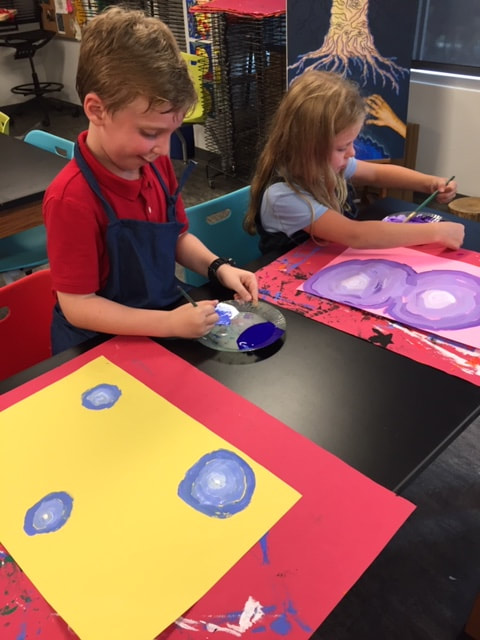
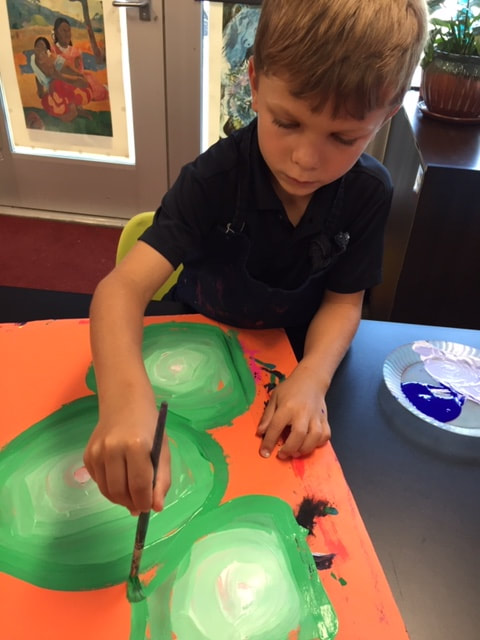
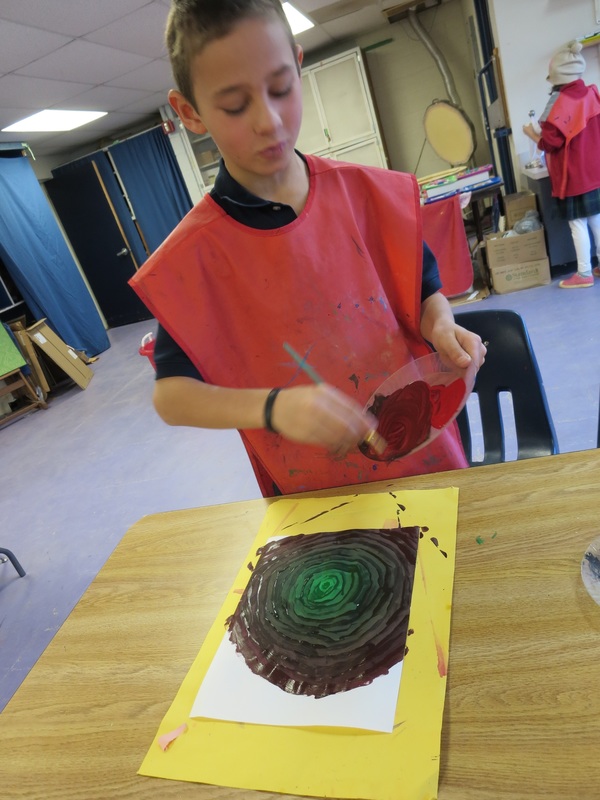
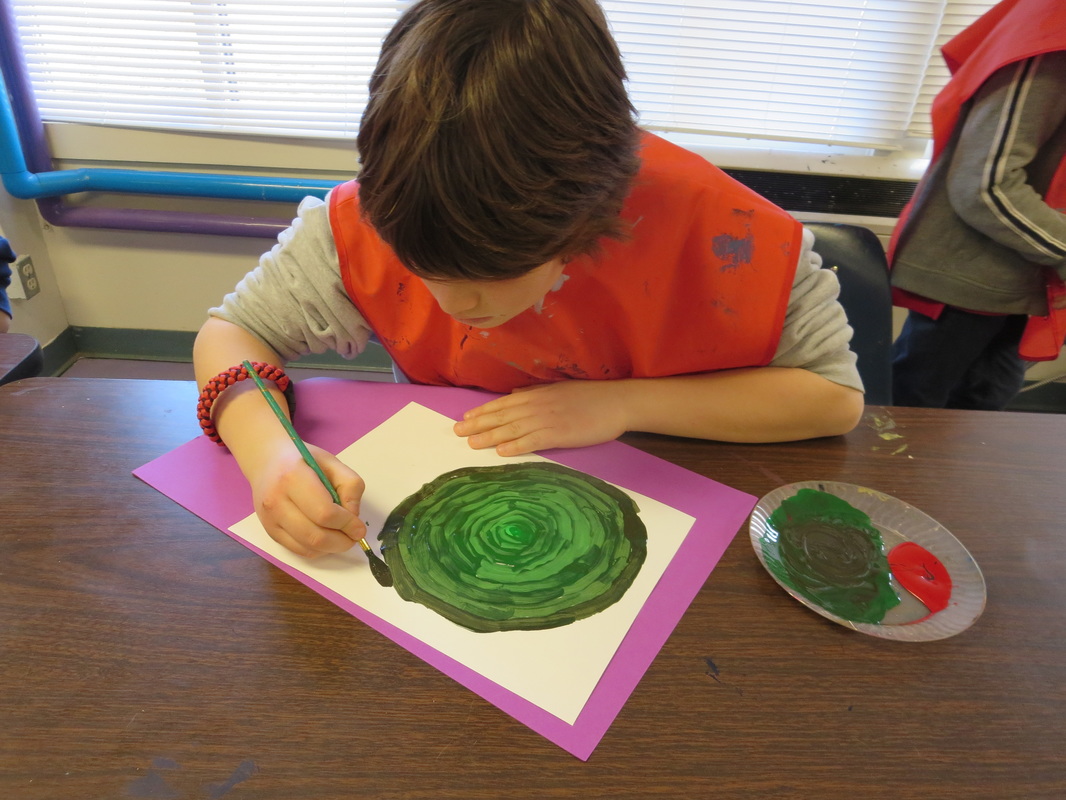
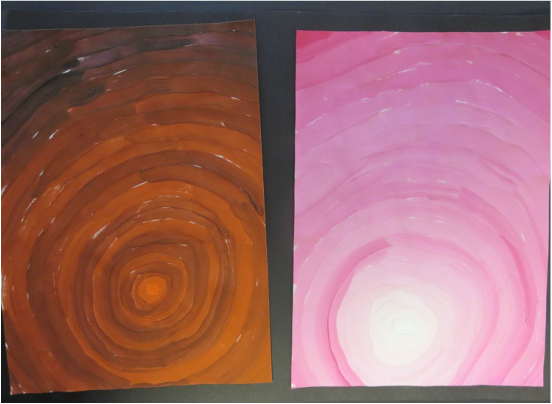
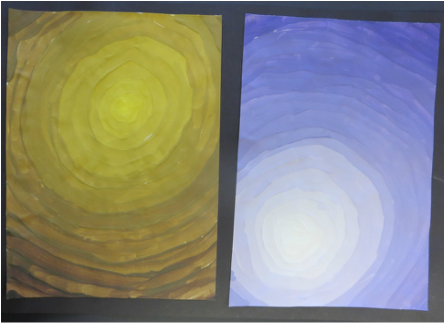
Picture
Picture
Picture
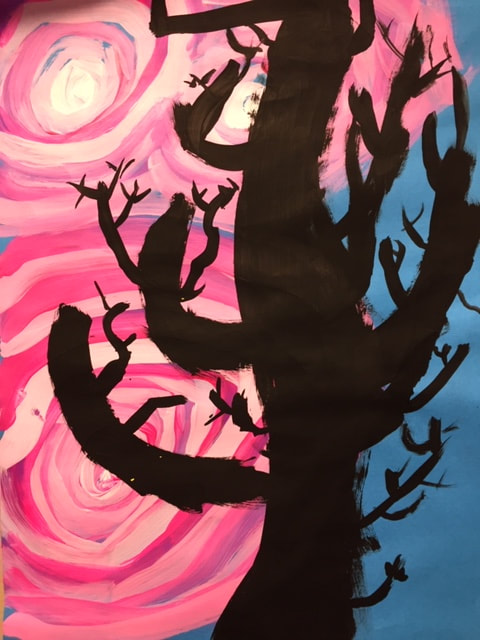
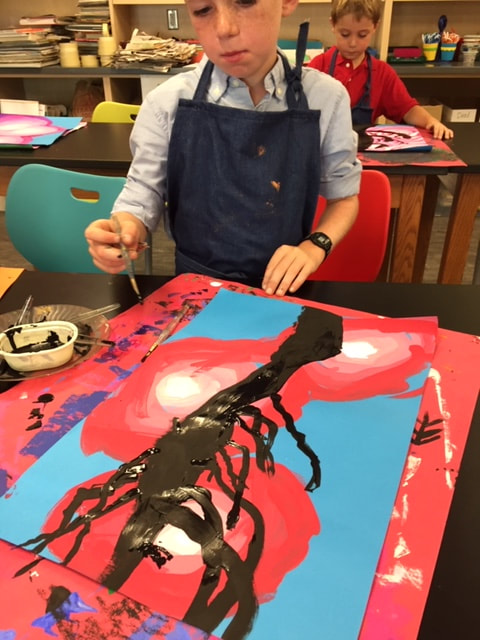
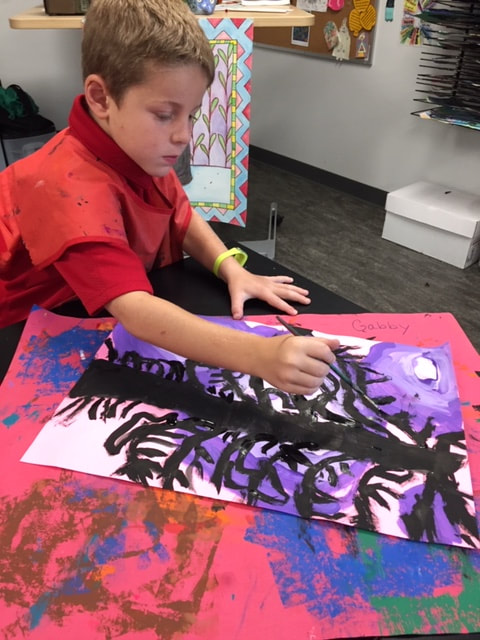
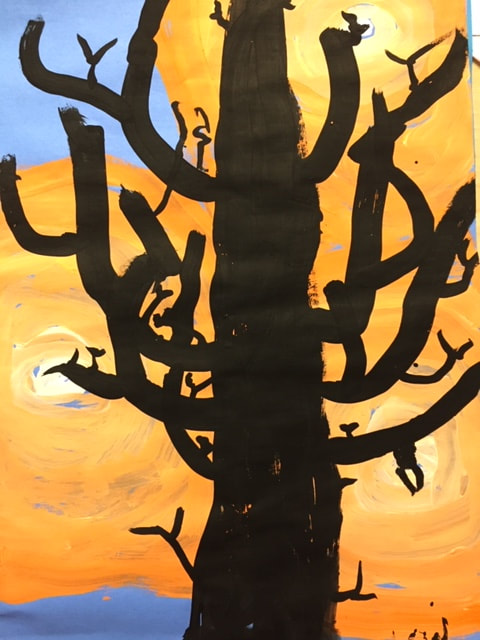
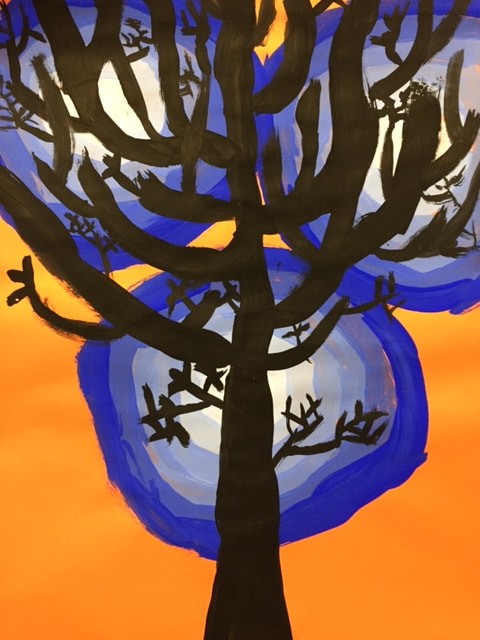
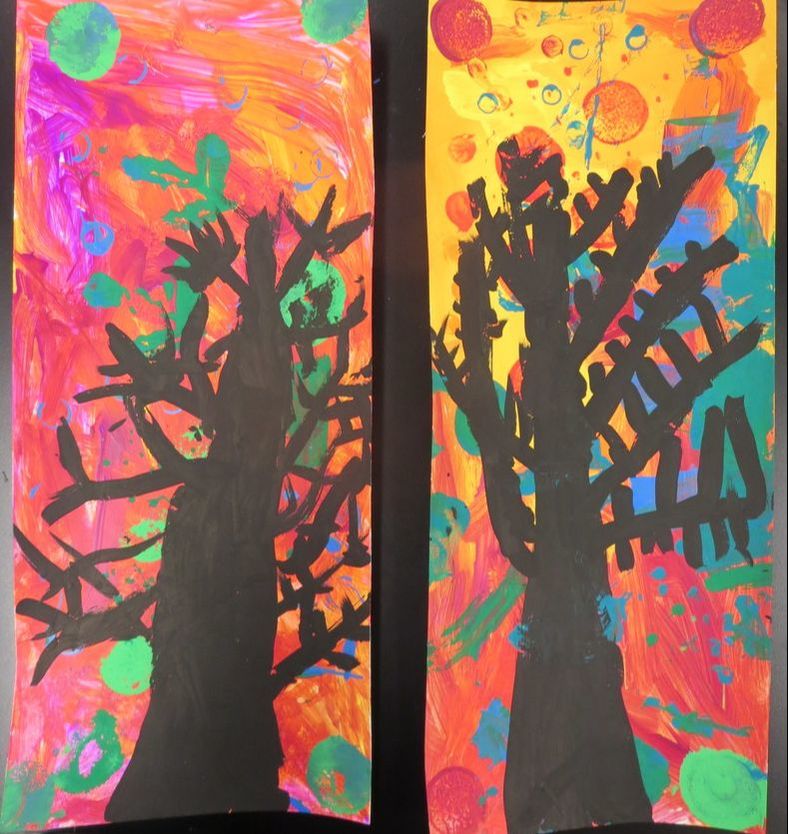
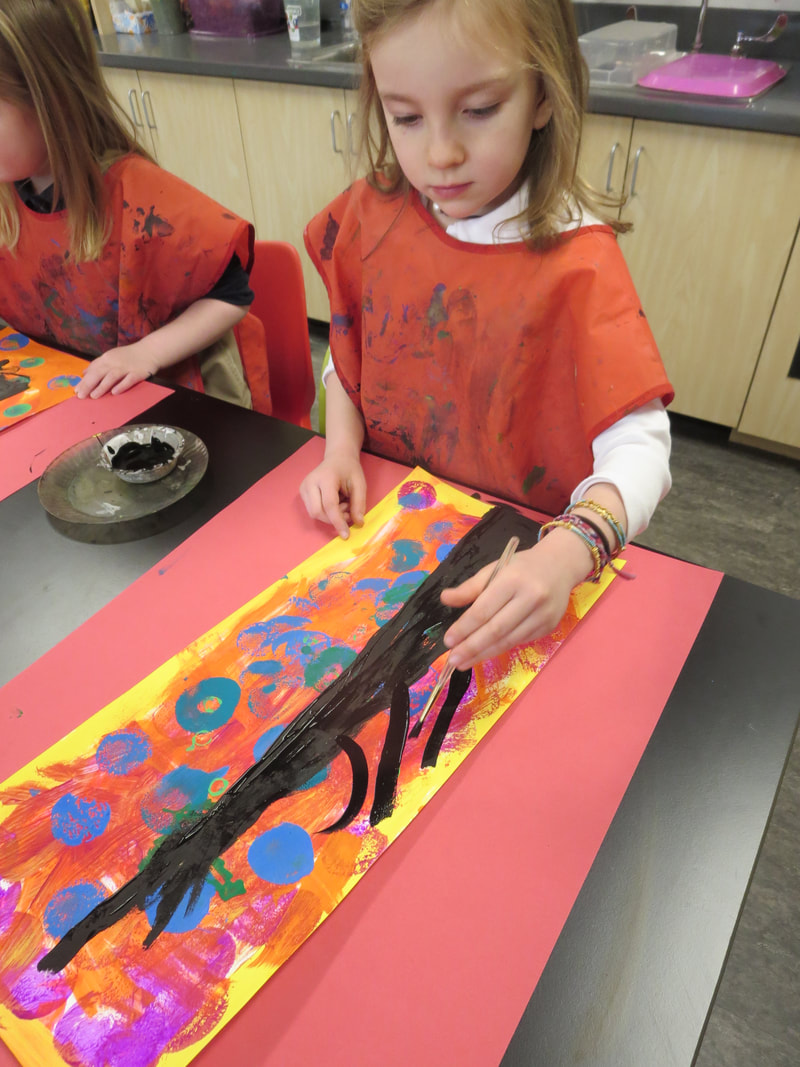
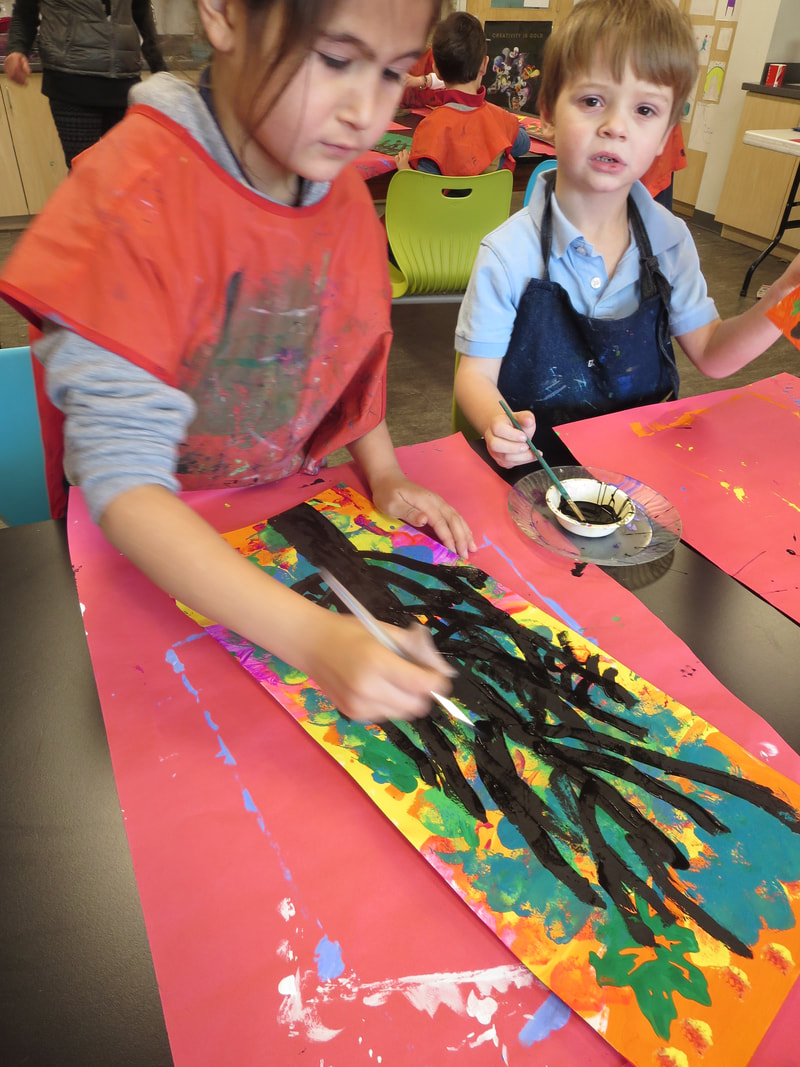
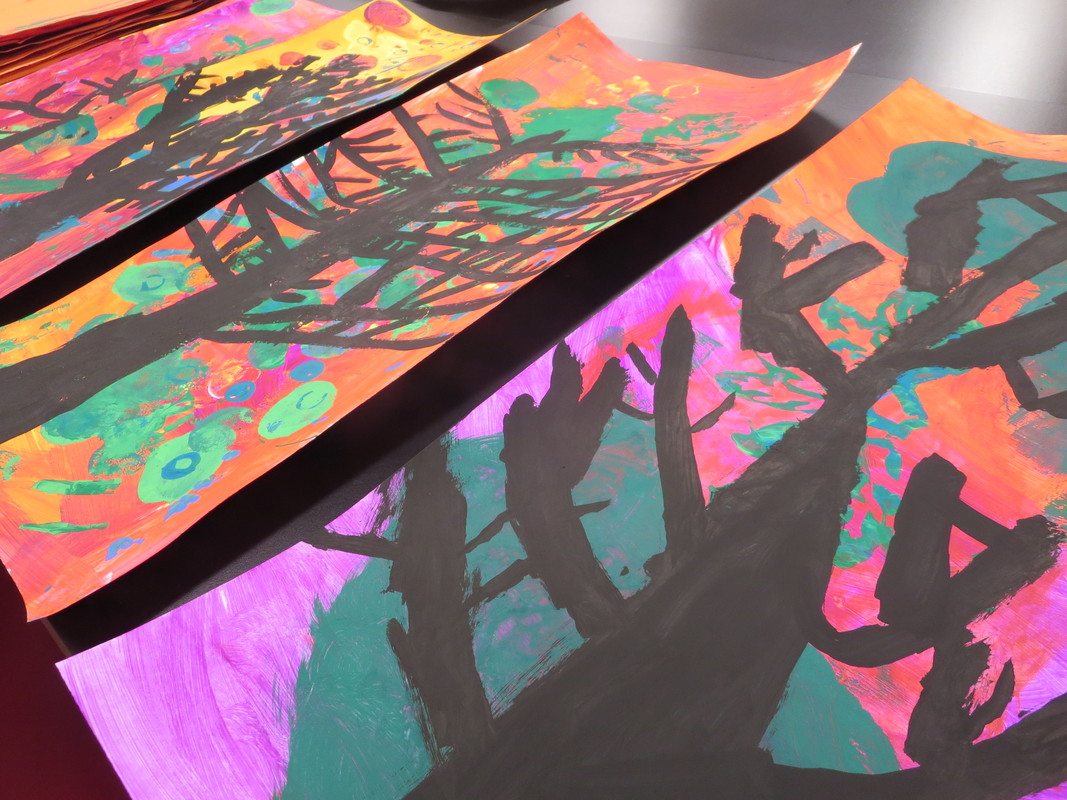
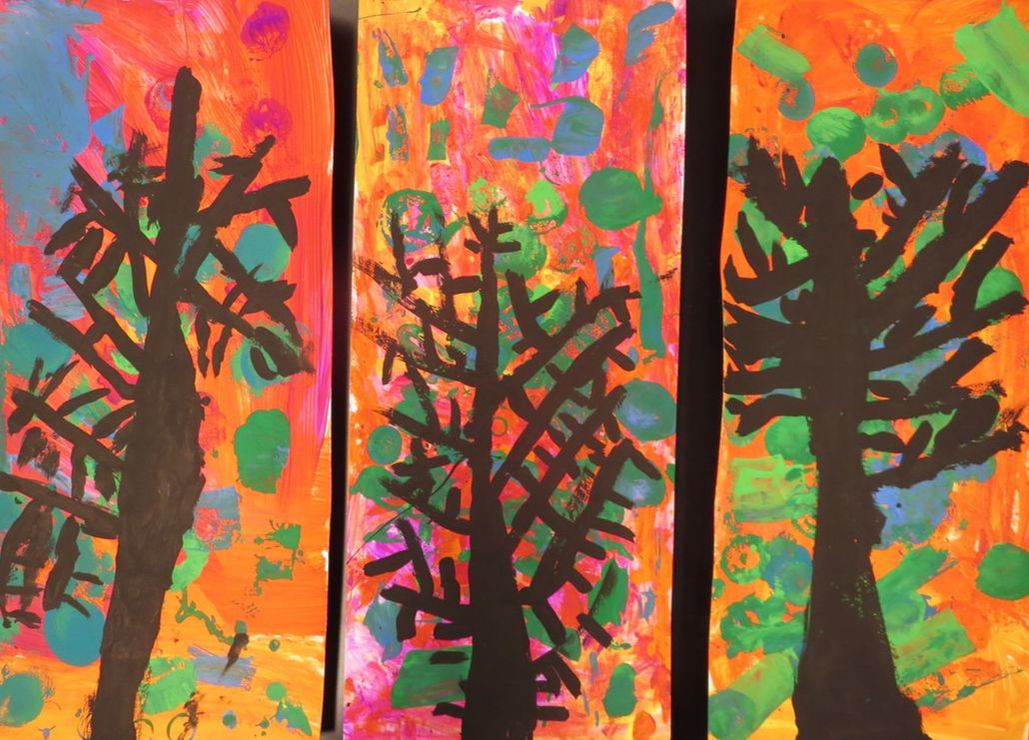
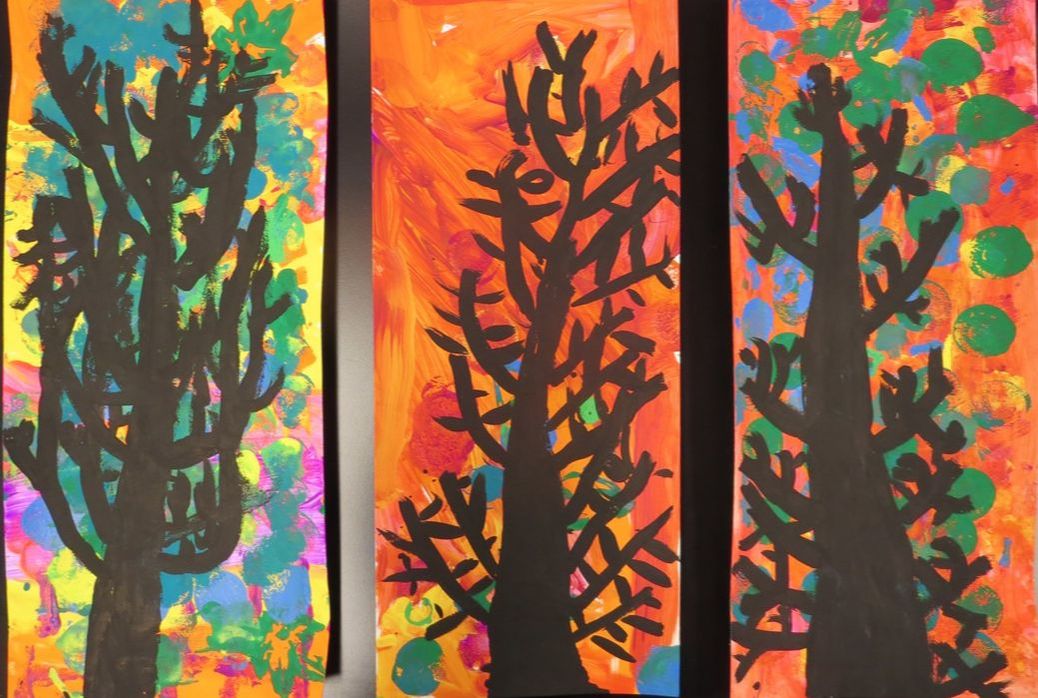
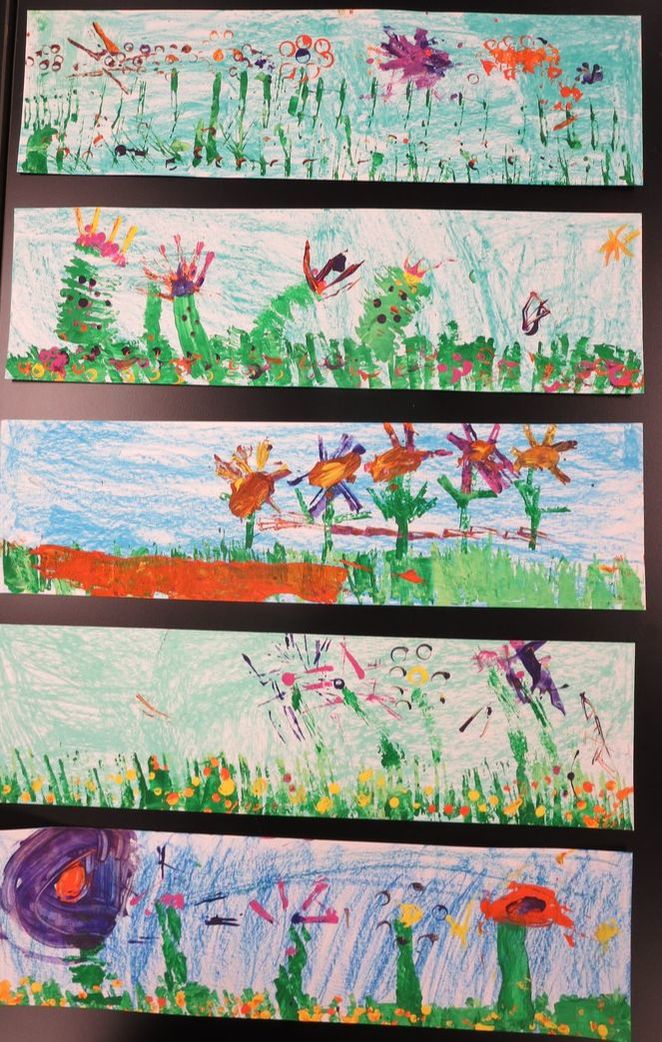
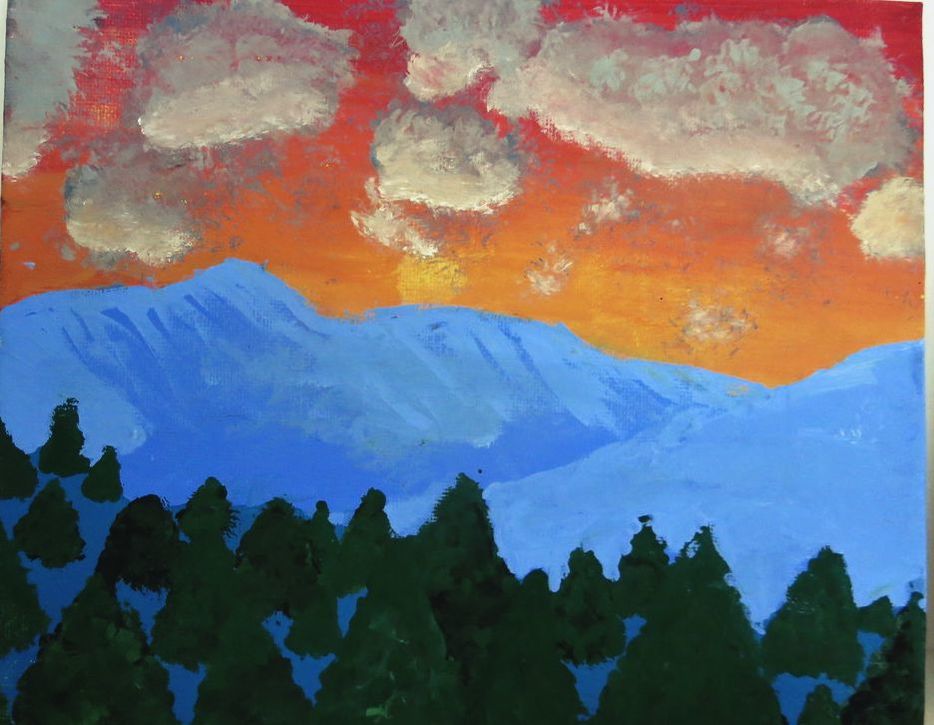
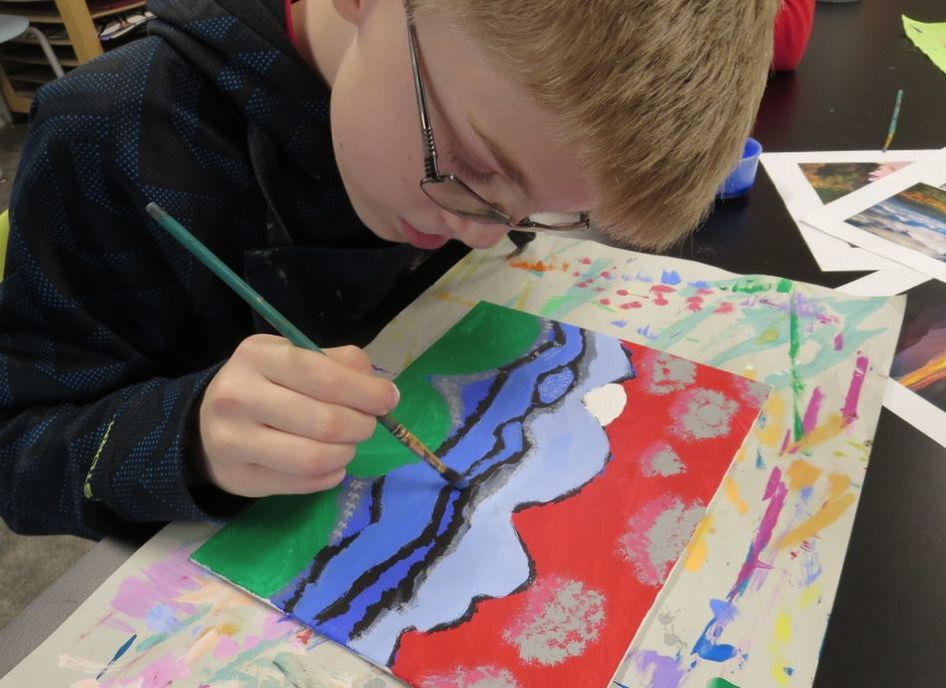
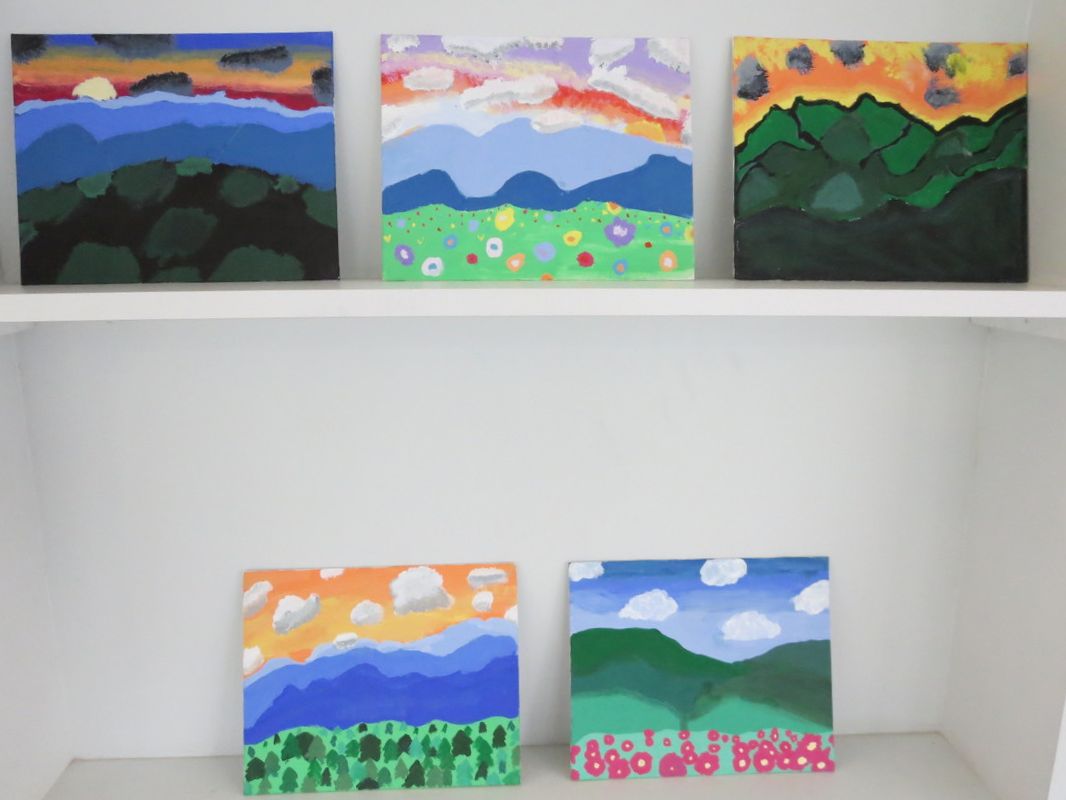
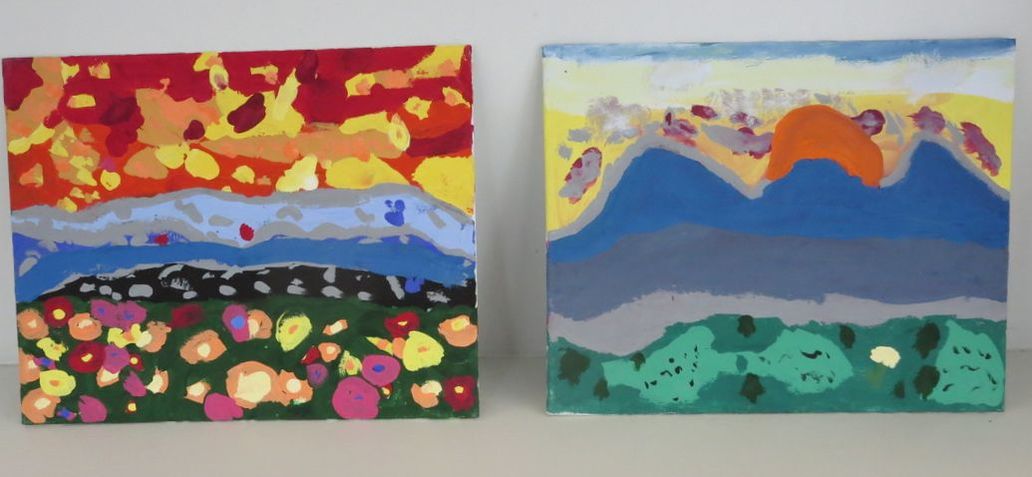
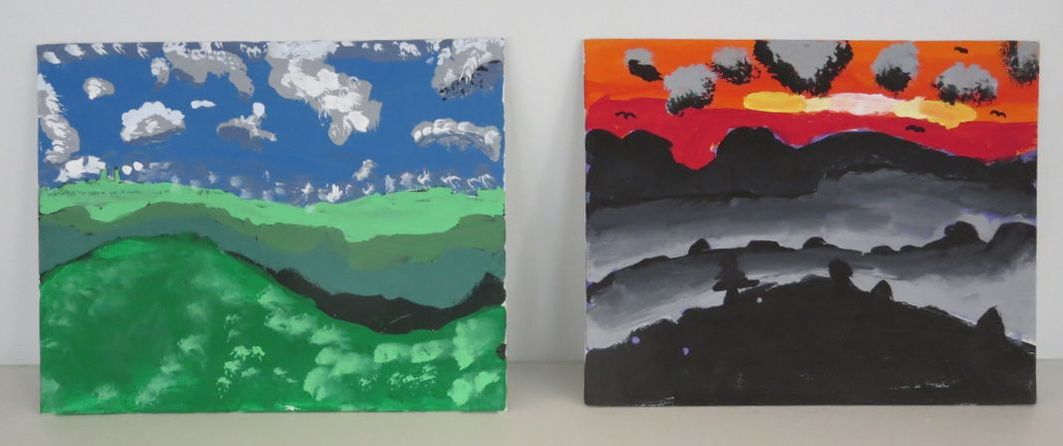
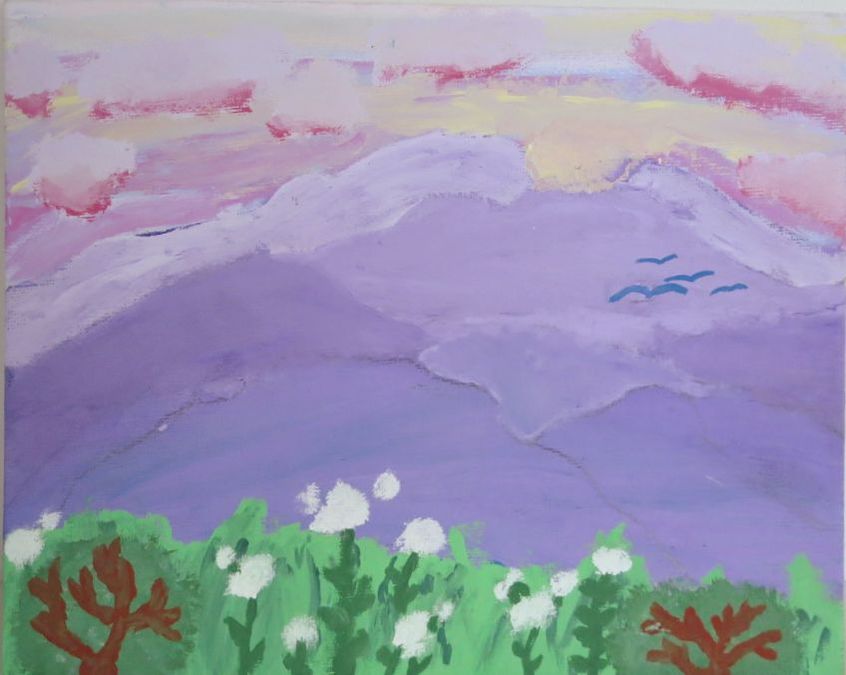
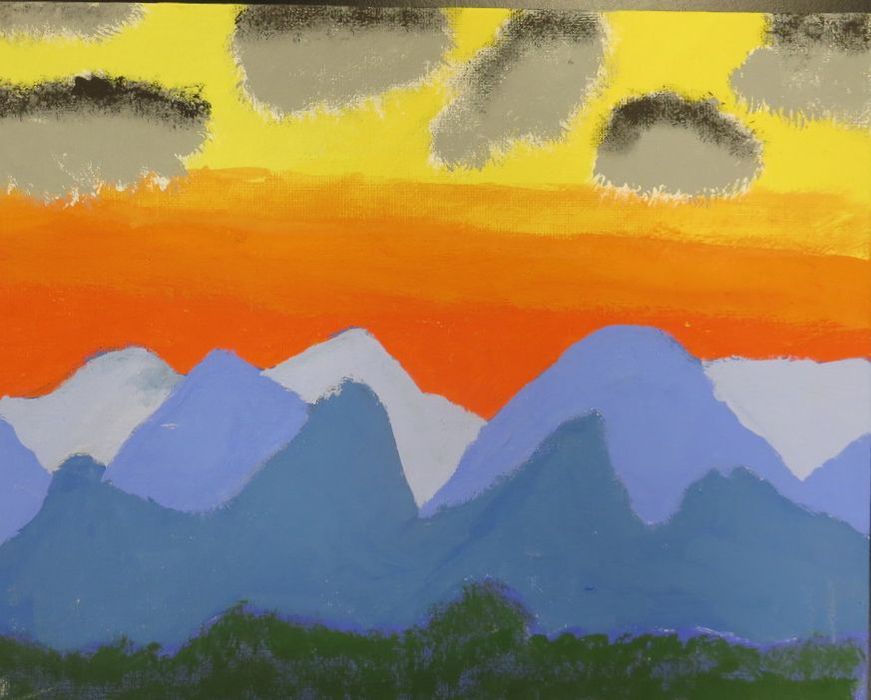
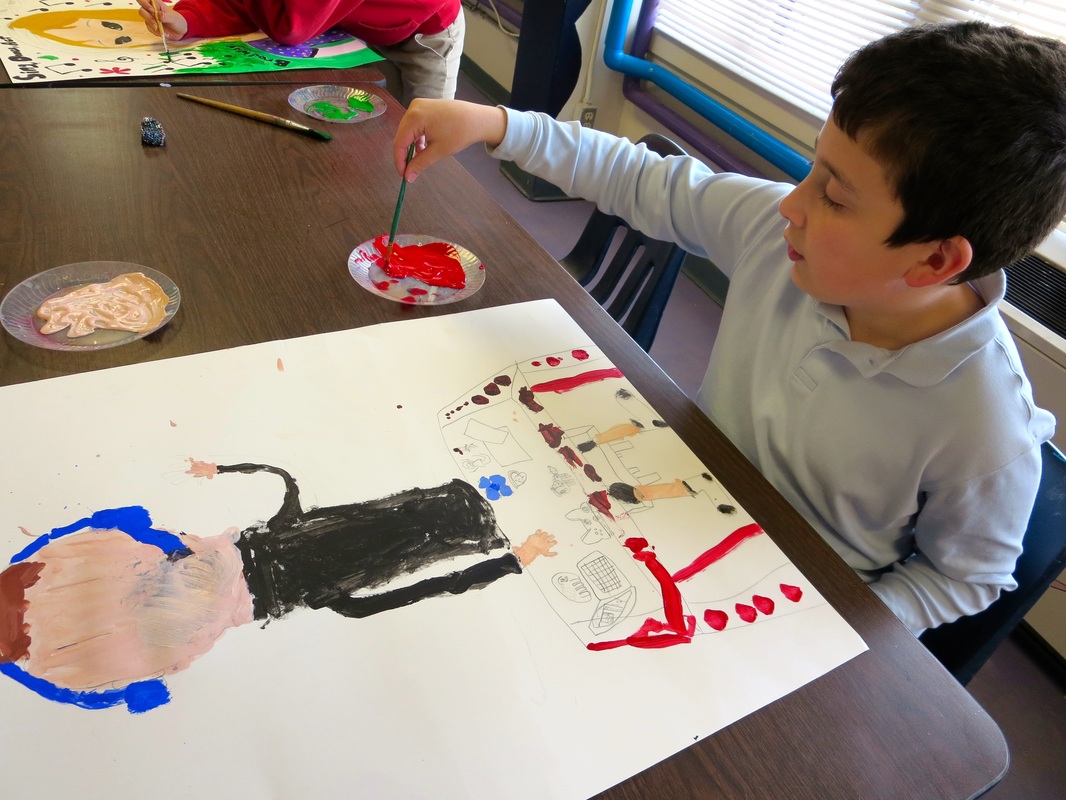
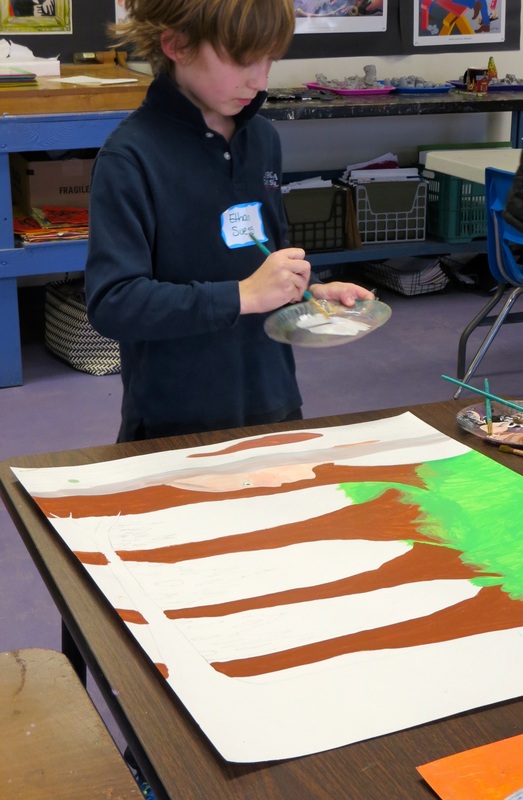
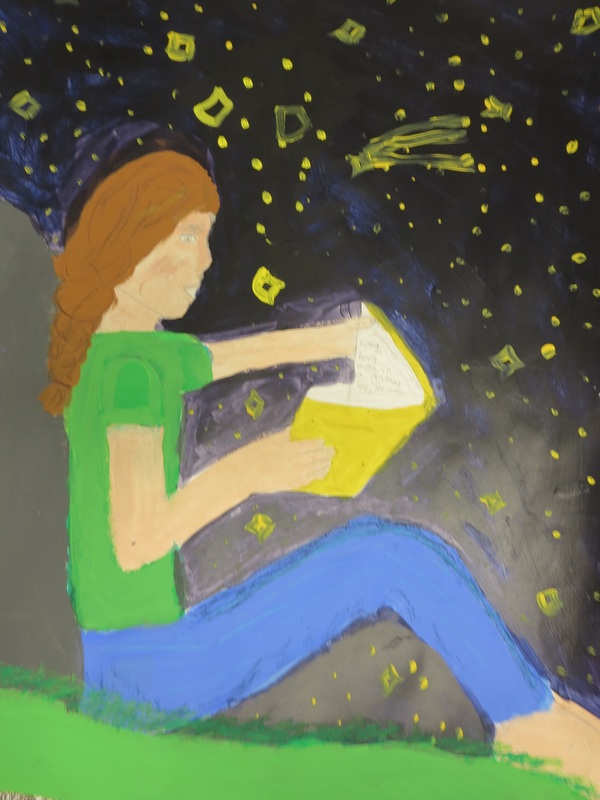
During the next art class, I taught students what the word 'silhouette' means and demonstrated by standing in front of a window with the classroom light on and then turning it off so that they could see my silhouette.  Always exciting!

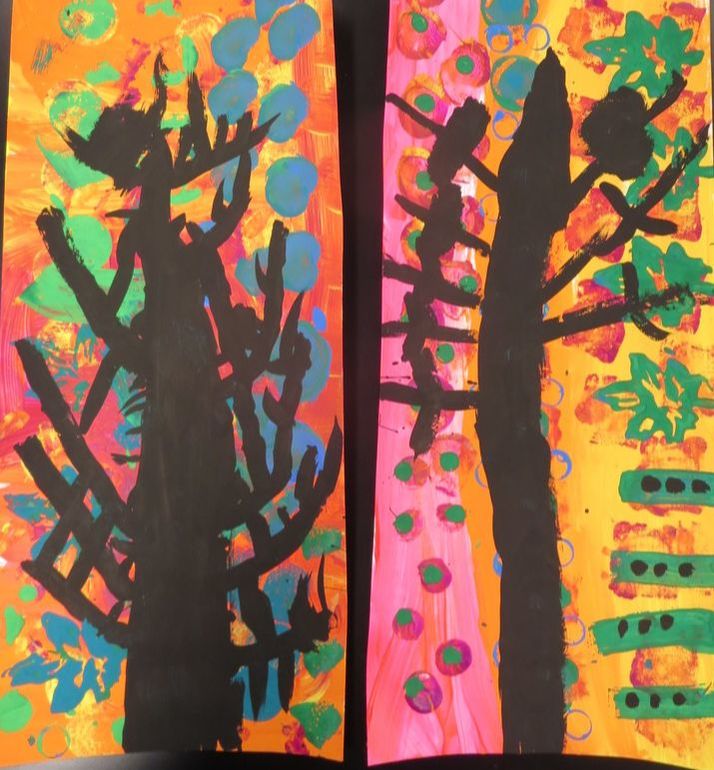
I showed them how to paint a tree silhouette by starting with a big thick line in the middle of the paper, and adding branches that reach up and out.  The students, again, loved this step of the process as well.

This was such a fun and successful project and only took two class periods!
Picture
Picture
Picture
Picture
Picture
0 Comments

4th grade monochrome animal paintings

4/27/2018

0 Comments

 
Picture
OK, so here's the thing.  My 4th graders did an incredible job on this project, they did better than I could've even imagined and silly Art teacher me forgot to take any in-process photos. I'll do my best , though, to explain what we did.

Before beginning the project, I gave the students a two week notice that they each needed to provide a grayscale printed photo of an animal.  I gave them the option to email it to me if they don't have a printer at home.  I told them that it could really be any animal as long as it was a close up and the photo should be about the size of their hand.

When it was time to begin the project, the first step was to have the students paint their background.  I asked them to select one color but a few begged to use two colors and I agreed, because why not.  I suggested bright colors that the grays would really pop on.  Turquoise and pink were popular choices.

The next step was setting up my two classroom projectors around the classroom, dimming the lights and teaching the students how to use them to project their image onto their canvas.  They worked together with a partner to figure it out and then traced their animals with a white pencil onto the background.  This ended up taking a lot longer than I expected and if I teach this project in the future, I'll definitely find a couple more projectors to borrow.

From here, I printed out some grayscale images for the students to reference that went from white to black in 10 steps and were number 1,2,3......10.  I had the students all start by looking at their photo and finding the areas that were a shade of 10 (black).  They all used their photo for reference and paint the black into their image.  The next step was to find all of the 1 shade (white) and paint that.  Next we all found the shade 5 and painted that.  From there the students were to find the different shaded 2-9 and to paint them accordingly.  Although this is easy to explain, it is a quite difficult process, especially for 9 year olds.

They really blew my mind though, I didn't realize how amazing that these would turn out and it was sooooo awesome watching the students persevere through this.  They were sooooo proud of themselves and I was an extremely proud teacher (like usual).
Picture
Picture
Picture
Picture
Picture
Picture
Picture
Picture
Picture
0 Comments

Kindergarten Abstract Tree Paintings

1/11/2018

0 Comments

 
Picture
This is my new favorite Kindergarten art project and it only took three 30 minute art classes!

We began this colorful project by learning about abstract art.  When I explain abstract art to the younger grades, I tell them that it is art with lots of lines, colors and shapes but nothing recognizable.  There is no cat or house, etc.  I was proud to hear that after this first class, students were using markers to create abstract art in their classroom during free time.  The first day of this project, students used lots of warm colors like yellow, pink and orange to fill their paper with color.  They used tempera paints and different tools such as sponge brushes, stamps, marker caps, cardboard scraps, etc to create a colorful abstract painting.  The second day, they did the same thing but used cool colors such as blue, turquoise and green and added layers of patterns on top of the warm colors.  They were instructed to just have fun and experiment.  
Picture
Picture
On the third day of class, we added a black tree silhouette on top of our abstract paintings.  I demonstrated what a silhouette is by having a student stand in front of a window and then turning off the light so they were heavily backlit by the sun, creating a dark silhouette of the students body.  
I also showed them how to paint trees by first painting a large tall triangle in the middle of the paper and adding big branches reaching to the sky.  Then they added little branches reaching to the sky off of the big branches.  Watching the students paint these trees was really magical as if seeing their artwork really come to life.  

​I absolutely LOVE how this art project turned out and am proud of the students for being so exploratory and brave as they tried new things in the art room. 
Picture
Picture
Picture
Picture
Picture
Picture
Picture
0 Comments

2nd grade observational flowers

11/13/2017

0 Comments

 
Picture


For more information about the process of creating these awesome Georgia O'keeffe-inspired flowers, see my blog post from a few years ago
​ ​http://anniesartroom.weebly.com/elementary-art/2nd-grade-georgia-okeefe-flowers

​

Picture
Picture
Picture
Picture
Picture
0 Comments

2nd grade cardboard fish

11/1/2017

0 Comments

 
Picture
The kids LOVE this project.  This is the second year I've taught it (though last year we did birds) and the students have a blast making them and the results are colorful and exciting.

This project definitely takes a couple hours of prep work by me but is totally worth it.  Before beginning this project, I cut coardboard into a ton of different shapes such as ovals, triangles, diamonds, circles, etc.  I make sure I have a bunch of large body shapes (they are between like 8" to 14") and a bunch of smaller pieces for fins, tails and eyes.  If I have 30 students, I make like 35 of each so that they each have a choice.  Even with box cutters this is pretty time consuming, but that's ok with me.

The first day of this project, students each go to different piles of the cardboard pieces and play with the pieces arranging them until they have a fish shape they like.  I tell each student that they must have a tail and at least two fins.  Once they come up with a design they like, they use Elmer's glue all to attach the pieces.  

The second class, we begin painting.  The tail is one color, the fins are each one color and the body is painted with large stripes.  The stripes can go horizontal, vertical or diagonal, whichever they prefer.  Some students even do squiggly stripes.  

The third class, they use other colors to paint patterns over the stripes.  Also, they paint and attach the eye(s).

This is a super quick, super successful project and I will probably do something like this every year (maybe robots next year?)...
Picture
Picture
Picture
Picture
Picture
Picture
Picture
Picture
Picture
0 Comments

Pre-K Flowers

6/3/2017

0 Comments

 
Picture
 If you're anything like me, you may struggle to come up with projects for Pre-K that are both engaging and age appropriate.

This project, let me tell you, has been one of the most successful that I've done with this age.  I absolutely love the end result and seeing how each students artwork turns out so unique.  They really enjoyed the process too and got a little messy along the way.

Students each started with a long strip of paper, probably 6" x 18".  I cut up strips of poster board so they would be nice and sturdy but any paper would work fine.  

They started by using a blue crayon, laying it on it's side and rubbing it all over the paper to create the sky.  Some students selected dark blue while others chose light blue and some even chose more of a seafoam color.  

Before they begin printing and adding the flowers, I cut up a bunch of cardboard into little squares and rectangles.  I put a paint tray on each table with three different shades of green and they use the edges of the rectangles to print 'grass' all along the bottom of the paper.  They also did a few tall grasses to use next time for their flower stems.
Picture
During the next class, I prep the same by cutting new rectangles and squares from cardboard and also provide them with some old pencils, maker tops, etc.  This time I give them a few colors to choose from that will work well with flowers.  I used yellow, orange, pink and purple this year.  

After discussing how there are tons of different types of flowers, they went to town creating their own flowers.  This is where the students really had fun and their individuality began to shine.  There were big flowers, little flowers, silly flowers, realistic flowers, etc.
Picture
Picture
I absolutely love how these turned out, look at some of these awesome flowers!
Picture
Picture
Picture
0 Comments

5th grade glue batik quilt

4/27/2017

33 Comments

 
Picture
 This project is one of my favorites that I have ever done!

The students all felt super successful and it is a really fun process.  I wish I had done a better job of documenting the first few steps but I'll explain it anyhow.

You can get a copy of a similar lesson plan of mine by clicking here. 

We began this by doing observational drawings of a bunch of different plants.  I borrowed houseplants from my fellow teachers classrooms for this.  The students did multiple large contour line drawings of the plants, mostly focusing on the leaves.

The next step is to trace the drawing with Sharpie and then put the drawing underneath a piece of wax paper and a piece of white fabric over that.  The wax paper is crucial so that the glue doesn't go to the fabric and stick to the drawing or to the table.  Tape it all to a table of board so that it doesn't move.  After taping it down, you will be able to see the drawing through the fabric.  Use blue gel glue to trace over the drawing onto the fabric.  I've tried other glues as well and others work but the blue gel glue is absolutely the best.  

Let the glue dry completely.  Overnight is the best.  Once it is totally dried, use watered down acrylic (or fabric) paints to paint over the entire fabric.  Be sure to cover the glue with paint too.  This assures that you have a great batik effect with strong white lines.  

​
Picture
Picture
Again, let it dry completely. 

The next step is to run warm/hot water and fill a bin.  Separate the fabric from the wax paper and drawing.  Soak the fabric for at least 10 minutes.  After about 10-20 minutes, use hands to rub all of the excess glue.  

Once the glue is completely removed from the fabric, rinse it in warm water and hang it to dry. 
Picture

The images turn our very vivid and colorful!  You can see how each students design turned out very different.  I gave them a limited color palette to work with since they will be used to make a quilt.  
I wish I could take credit for the next step but I passed the batiks over to my friend and she took care of the rest.  She sewed it all into this fabulous quilt.  I love it sooooo much and wish I could keep it forever....but we sold it at the school auction.  
Picture
Picture
Picture
33 Comments

5th grade Blue Ridge landscapes

2/21/2017

0 Comments

 
Picture
What a great project!  

These landscape paintings took the students about 7 classes to finish and so many students really poured their heart into their artwork.  I saw 5th graders totally immersed in the process and lots of students being courageous trying new techniques.

We began this project by looking at photographs of the lovely landscape where we live.  Our school is less than a mile from the Blue Ridge Parkway and being in Asheville, we are a few minutes drive from these gorgeous mountain views.  
We looked at photographs of mountain landscapes during sunrise, mid-day and sunset.  I helped direct a conversation about the three layers that are seen in each (background, midground, foreground) and about how during the different times of day, the colors are different in each layer.  
Picture
Picture
Picture
Students began this project by drawing a sketch first and using colored pencils to show what colors they would be using.  I told them that I should be able to tell what time of day it was just by looking at their sketches and seeing what colors they selected.
Next they drew two lines across their canvases to separate the image into the three layers-background, midground, foreground.  
​
I'm annoyed that I didn't take any photos of the next step, but they each selected just one color for each layer and painted in each layer.   Many of the kids were very confused about this step and ha a hard time grasping why they would choose just ONE color to paint a layer when there are obviously so many more colors.
I reassured them that many artists work in a similar way and that it provides a base color as they add in more layers  and details of other colors. 

We used acrylic paints for this project that I pre-mixed.  I had about 30 different colors set out for them.  I just put lids on them between classes to keep them wet. 
Picture
Next, we began adding other colors and details to the background.  They started by painting the colors that are seen in the sky (not the clouds) and practiced blending the colors together with wet paint and water.  Once that was finished, the students added the clouds.  They focused on the main color of the clouds and added shadows.  Most students spent 2-3 whole class periods working on the background.  After we were completely finished with this project and I asked students their favorite part of this, almost all students said the sky was the most fun (and most challenging).
Picture
Picture
Picture
Students used the same technique on their midground and foreground.  We talked about painting in the base colors that they see then adding in details and shadows.  

On the foreground, students made sure to make the trees, flowers, etc that were further back smaller than what was closer.

I absolutely LOVE how these landscapes turned out.  Each student's unique style really shines.  They worked hard and were very engaged during these paintings.  I am a very proud art teacher!
Picture
Picture
Picture
Picture
Picture
Picture
0 Comments

2nd grade cardboard birds

1/10/2017

0 Comments

 
Picture
I love birds!  Very much, which is why I was so happy about finding this blog post on pinterest one day!

I decided to do the project with my energetic 2nd graders and just as I imagined, they loved it!

Before the students arrived for class, I cut up a bunch of different sized and shaped pieces of cardboard.  There were pieces as big as 18 inches and some as small as 4 inches.  I cut out a bunch of organic shapes and a few circles/ovals for eyes.

To begin the project, I showed students a slideshow of some local Asheville folk artists who paint birds and we talked about how the artists simplify the birds into shapes.
local_folk_art.pptx
File Size: 1208 kb
File Type: pptx
Download File

After the slideshow, students rummaged through the cardboard pieces and layered them together to create a simplified bird image.  Once they came up with a design they were pleased with, they used Elmer's glue-all to attach the pieces.
Picture
The next class, after the glue had dried, students began by painting the head one color, the wings one color, the beak one color, the tail one color, etc.  The body was painted in thick stripes of color.

To finish this project, students used other colors to paint patterns over the bird.  

This project was short and sweet, it only took three classes.  The students had a blast and the birds turned out SO cool!
Picture

Picture
Picture
Picture
0 Comments

2nd grade abstract collaboration

2/3/2016

0 Comments

 
((To see last year's post of this project, click here.))

One of our cross divisional Arts team two year goals is to have every grade level from K-12 create some sort of a collaborative visual arts project.  I haven't done this quite yet with every grade yet, but am excited about this abstract collaborative project done for the second year with 2nd grade.

We looked at images of Kandinsky's artwork and together as a team, students spent four class periods creating these large abstract paintings.  For more information about the process, click the link above.
Picture
Picture
Picture
Picture
Picture
Picture
Picture
Picture
0 Comments

2nd grade Georgia O'Keefe flowers

5/26/2015

0 Comments

 
Picture
To create these beautiful Georgia O'keeffe-inspired drawings, students began by observing (artificial) flowers and doing large pencil drawings on 12" x 18" paper so that the image filled the whole page.  Before beginning, we looked at images of O'keeffe's amazing artwork and reflected on her quote "I found I could say things with color and shapes that I couldn't say any other way - things I had no words for."

The next step was to use acrylic paint to paint the background space of the work.  This was inspired by O'keefe's style of painting her backgrounds very simply and often just one color.  

​Students used oil pastels to color the flowers and outlined with black.  
This project took just two class periods and was very successful.  A great end-of-year project!
Picture
Picture
Picture
Picture
Picture
Picture
0 Comments

4th grade tints, shades, and complementary colors

3/17/2015

0 Comments

 
Picture
Picture

To learn about tints, shades, and complementary colors, 4th grade students created colorful radial paintings.

When the students came into class, I had written on the board:

Tint=___________________+_____________________
Shade=_________________+_____________________
Complementary colors=_______________________________________

We discussed how these different words are used in conversation.  Shades are another word for sunglasses.  Shade is the area that is hidden from the sun and is in shadows.  A 'compliment' is when you tell someone you like something about them.  Tint is a word used when windows are darkened (unfortunately this is misleading).

In art terms, a Tint is a color plus white.
A Shade is a color plus black.
Complementary colors are those opposite of each other on the color wheel.  For instance,  orange and blue are complements, red and green are complements, and yellow and purple are complements.

Students each began by doing a complementary colors.  They chose the two complements they wanted to use and began by painting one color dot on their page.  Next they added just a teeny tiny bit of the complementary color to that color, mixed it well, then painted a thin ring around the dot.  Next, again, they added a teeny tiny bit of the complementary color, mixed it well, then painted a ring around the first.  Students continued this until they filled up the entire sheet of paper.  

The next class students did the same technique with tints and shades.  For the tints, students started with a white dot in the center and slowly added a color to it.  For the shade, students began with a color dot in the middle and slowly added black.

To finish up this project, students each selected their two (of the three) favorite paintings and glued them down on black paper together.  While they were doing this, I heard multiple students saying things such as "My mom is going to love this" and "These turned out so pretty" and other joyful exclamations!
Picture
Picture
Picture
Picture
Picture
0 Comments

5th grade self-portraits

2/19/2015

0 Comments

 
WHO AM I???

5th grade students looked at and discussed many images of self-portraits by other artists.  As we went through the images, I really pushed students to think about how this represents WHO the artist is.  I asked them to try to look past the obvious such as hair color and gender, but rather to question what the different elements of the portrait might symbolize.  
Picture
Picture
Students talked about colors used, background, symbolism of jewelry, painting style,  facial expression and more.  Their ideas were insightful and complex.  This discussion about self-portraits made me very proud of the 5th grade students.

After this discussion, students made lists about themselves to prepare for creation of their own self-portrait.  They wrote things like favorite colors, meaningful places or experiences, hobbies, and such.
Using this list for inspiration, students did at least three thumbnail sketches (small sketches) to come up with multiple ideas.  

Next students had to create their final self-portrait showing WHO they are.  They did this on large poster board paper beginning with a pencil drawing, moving onto acrylic paint and then finally adding details with oil pastels.

The results are super fun, very creative and expressive!
Picture
Picture
Picture
Picture
Picture
Picture
Picture
Picture
Some of the finished products:
Picture
Picture
Picture
Picture
Picture
Picture
Picture
Picture
0 Comments

3rd grade double fish project

2/19/2015

7 Comments

 
Picture
3rd grade students did two fish projects using totally different materials. 

 The first were clay slab fish.  To make these, each student started with a slab of clay and they had to cut the clay into different shapes and layer to make a fish.  Adding texture using different materials and techniques was the focus during this process.  Students used texture plates, knives, forks, stamps, marker tops, etc to do this.  After the fish were fired in the kiln, we used an oil pastel resist method to add color to the fish.  They started by using oil pastels to cover the fish in bright colors.  After the fish was nice and colorful, we used watered down acrylic paint to completely cover the fish.  When rinsed under water, the oil pastels show through and the paint covers the areas that were not colored.  These turned out AMAZING.  
Picture
Picture
Picture
For the second fish project, 3rd graders selected a photo of a fish that they liked.  They tried their best to use observation skills and create a life-like fish drawing.  They began by drawing the outline with pencil and moved on to use oil pastels.  Rather than covering the whole fish with the pastels like they did on the clay, they just drew the outlines and textures such as scales, stripes, etc.  After the oil pastel, students used watercolor paints-plain and neon-the create the most realistic fish possible.  Students had to focus on showing highlights and shadows seen in their fish image and tried to really capture the different colors seen in the photograph.  After these were all done, I spent time cutting them all out and hanging them in the hallway to create a fun underwater scene. These turned out really amazing as well.  Definitely a project that I will continue in future years.
Picture
Picture
Picture
Picture
7 Comments

2nd grade Tree of life

1/13/2015

0 Comments

 
Picture
Picture
Picture
Picture
The tree of life symbolizes the connection between the heavens and the earth.  I discussed what this means with students and told them that heaven for them doesn't have to mean the religious heaven but can also mean the universe or whatever it is that they believe in.  Students seemed to love this idea and one sweet girl said that she believes in dragons and magic so for her the tree of life represents the connections between her life here on earth and the magical, fantastical world of dragons and elves.  I love it!

We also talked about different trees in our lives which have been important.  Students had stories about the trees they climbed at their grandparents, trees that they lay under and read, etc.  It was agreed upon that trees are very special.

We began this project by practicing drawing the tree of life and spirals with paper and pencil.
Next they selected a background color (black, purple, blue, green, or grey) and used gold acrylic paint to make our trees.  The tree trunk had to go to the top of the paper and the spiral branches had to go in all directions and off the page in at least one area.

Next students used Sharpies to add details such as those seen in the original Klimt painting.  Circles, squares, triangles and other shapes create a whimsical environment.

The next class period we spent using pencils, cardboard, old glue stick tops, etc to do printmaking designs on the tree.  This added an extra layer of depth to the image and they had a lot of fun experimenting.

The results are quite stunning.  After finishing their work, students wrote, responding to the prompt "What does the tree of life mean to you?"  That was definitely the icing on the cake.


Picture
Oh Gustav Klimt, my artist heartthrob, how I love thee.... 
 I get so excited about the artwork of Gustav Klimt.  He is my absolute favorite artist and I just can't get enough of the ornate, decorative elements he incorporates into all of his work and the sparkling golden hues....It's like a teenage crush.

REALLY THOUGH.  The Tree of Life by Gustav Klimt, jaw dropping, awe-inspiring beauty.  For this reason and because of the symbology of The Tree of Life,  I felt that this was a very strong lesson for second grade students.  They were very engaged with the project.  I don't think they fell in love with Gustav Klimt quite like their Klimt-obsessed art teacher with Klimt tattoos on her forearms...

Picture
Picture
Picture
Picture
Picture
Picture
Picture
Picture
0 Comments
<<Previous

    Author

    Annie Monaghan.
    Art lover.
    Art creator.
    Art teacher.

    RSS Feed

    Categories

    All
    1st Grade
    2nd Grade
    3rd Grade
    4th Grade
    5th Grade
    Abstract
    Art History
    Art Videos
    Auction
    Batik
    Cardboard
    Chalk Pastel
    Clay
    Collaboration
    Collage
    Colored Pencil
    Color Wheel
    Contour Lines
    Drawing
    Highlights And Shadows
    Kindergarten
    Landscape
    Mural
    Names
    Notan
    Observational Drawing
    Oil Pastel
    Online Art
    Origami
    Paint
    Painting
    Papier Mâché
    Patterns
    Portraits
    Pre K
    Printmaking
    Relief Sculpture
    Remote Art
    Remote Learning
    Sculpture
    Self Portrait
    Self-portrait
    Sewing
    Shapes
    Sharpies
    Still-life
    Symmetry
    Texture
    Tissue Paper
    Warm And Cool Colors
    Watercolor
    Weaving

Powered by Create your own unique website with customizable templates.